Staying Safe in Rattlesnake Country
It only takes one misstep in rattlesnake country to change your hike—and your health. We had packed for blisters, sunburns, and maybe a brush with heat stroke—but not for a rattlesnake encounter. In an area with no cell phone service and no vehicle nearby, we were not prepared for our near disaster! That experience made one thing clear: rattlesnake safety isn’t optional—it’s essential for anyone exploring in rattlesnake country.
🐍 TL;DR
We nearly stepped on a camouflaged rattlesnake in Joshua Tree, which underscored how essential rattlesnake safety truly is. This guide covers:
- Proven prevention tactics (noise-making, staying on clear paths, avoiding peak snake times)
- First-aid steps for strikes (stay calm, immobilize, get help fast)
- Don’ts (no tourniquets, no cutting, no ice)
- Recommended gear (protective boots, emergency comms, snakebite-ready first aid)
The Backstory
Several years ago, we were camping at Jumbo Rocks Campground in Joshua Tree National Park. If you’ve never been, I highly recommend it. The landscape is surreal—massive granite boulders piled high like a natural playground for adventurers of all ages.

Within thirty minutes of arriving, we had camp set up and were off exploring. The kids were in awe, scrambling over rocks and scouting the best spots for their next “Insta-worthy” shots.
We set out along Skull Rock Trail, eventually arriving at the iconic Skull Rock itself. After a round of group photos, Joshua broke off from the group to explore a nearby rock formation on his own—at a pace none of us could keep up with.

I was with Sarah and the other girls when we suddenly heard Joshua yell, “Oh my God! Oh my God!” I couldn’t see him. He didn’t respond when I called out.
Complete radio silence.
My mama heart panicked!
Finally, he came running around a bend—visibly shaken—and told everyone, “We need to go back to the motorhome.” He sprinted back to the road and walked straight down the middle of it all the way back to site!
Joshua’s Story
He’d found a high rock he thought would make a “dope” photo spot and began to climb. We had warned the kids to watch their step and be aware of rattlesnake safety because snakes are common here—but nothing prepared him for what he encountered.
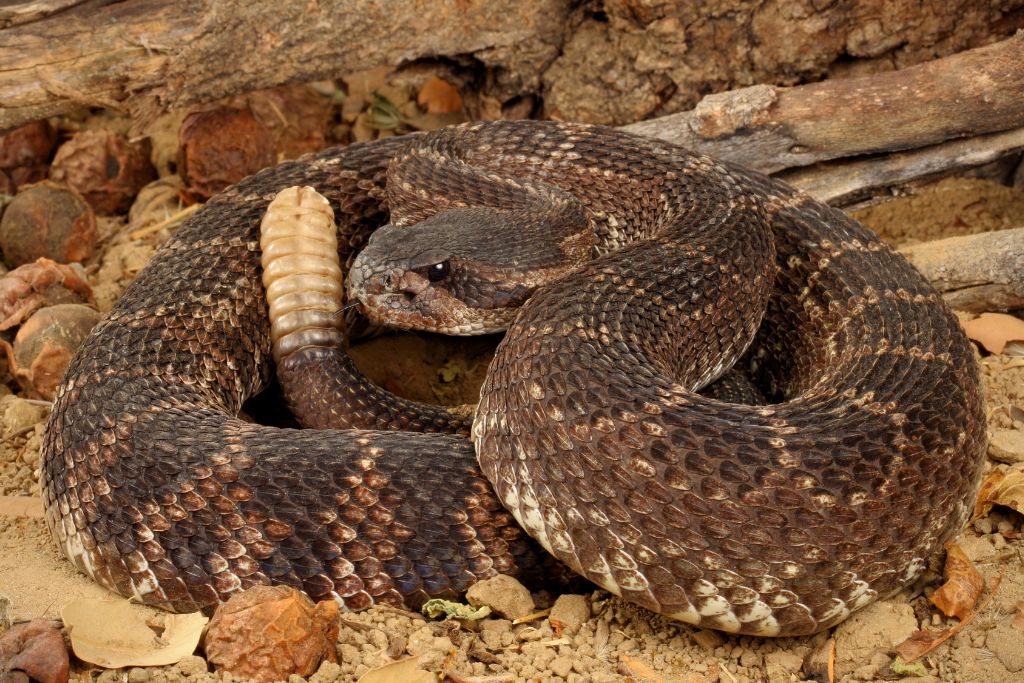
The snake blended in almost perfectly with the sunbaked granite. He didn’t see it. But just as he was about to step, he heard the telltale rattle.
He froze.
He had been inches from stepping directly onto the snake.
Do’s and Don’ts if You Get Bitten on the Trail
Rattlesnake venom begins to take effect almost immediately, and there’s no DIY method to neutralize it in the field. The most important thing you can do is prevent the situation from getting worse while waiting for or making your way toward help. While limiting movement is important to slow the spread of venom, your top priority is reaching medical care. If you’re in a remote area and help isn’t coming to you, you must do whatever it takes to get to help—move slowly and steadily, but don’t wait. Time is a critical factor in rattlesnake safety.
Snake Bite First Aid
**The only treatment for snake bites is anti-venom. Early treatment is critical.**
✅ Do
- Call 911 or trigger a satellite SOS if you’re out of service.
- Stay calm and keep your heart rate down. Stress and movement increase venom spread.
- Keep the bite site at or slightly below heart level. Elevation can increase swelling; too low may worsen tissue damage.
- Remove rings, bracelets, or tight clothing before swelling starts.
- Immobilize the limb if possible (e.g., use a sling or keep it rested).
- Note the time of the bite. This helps medical teams track symptoms.
❌ Don’t
- Don’t cut, suck, or apply suction. It’s ineffective and increases infection risk.
- Don’t use a tourniquet. It can cause permanent damage or limb loss.
- Don’t apply ice or soak in water. It worsens tissue damage and doesn’t slow venom.
- Don’t drink alcohol or caffeine. They increases heart rate and venom spread.
- Don’t wait “to see if it gets worse.” All bites should be treated seriously.
- Don’t try to catch or identify the snake. Risk of more bites; not needed for treatment.
**Experts agree that most, if not all, over-the-counter snake bite kits are ineffective and can even make the situation worse.**
Bite Prevention
Rattlesnakes are a natural part of many hiking environments across North America, from deserts and canyons to grasslands and forests. While they typically avoid human interaction, accidental encounters can happen—especially when hikers move quietly through their habitat without realizing a snake is nearby.
In rattlesnake country, awareness is everything. Whether you’re hiking in Joshua Tree, Arizona, or anywhere snakes make their home, prevention is your first line of defence. Here’s what every hiker should know before setting foot on the trail.
Rattlesnake Prevention Tips
1. Make Some Noise While Hiking
While rattlesnakes don’t hear sound the way humans do, they’re highly sensitive to ground vibrations. Light conversation, trekking poles, or deliberate footfalls give them a chance to slither away before you get too close. This is especially helpful in dense brush or around rocks where visibility is poor.
2. Avoid Tall Grass, Brush, and Rock Crevices
Rattlesnakes love to hide in shady, cool spots during hot days. Stick to wide, clear trails when possible and step on, not over, logs or rocks (so you can see what’s on the other side).
3. Never Hike with Headphones In
You’ll miss the warning rattle or the movement of a snake if you’re listening to music or a podcast. Staying audibly aware is a key part of your safety. *A startled snake might not rattle before striking. Stay alert.*
4. Step on Rocks and Logs, Not Next to Them
When stepping over a log or rock, place your foot on top first—never directly beside or over it blindly. A snake might be curled up right on the far side.
5. Don’t Hike Alone in Remote Snake Country
If you’re bitten and can’t walk or call for help, having a hiking buddy can save your life. At the very least, leave your plans with someone and carry an emergency communication device.
6. Avoid Hiking at Dawn, Dusk, or Night in Warm Seasons
These are peak times for snake activity, especially in spring and summer when days are hot. If you do hike during these times, be extra cautious.
7. Know the Season
Spring and early summer are prime rattlesnake season, when they’re emerging from brumation (a reptile’s version of hibernation) and are more active and irritable.
Encountering a Snake on the Trail
If you encounter a rattlesnake on the trail, do NOT try to move it. Rattlesnakes are not aggressive by nature— they strike only when they feel threatened or cornered. In most cases, they’ll try to escape if given the chance. The best response is to stay calm, back away slowly, and give the snake plenty of space to leave on its own. If it doesn’t move, it’s time to turn back. Remember, we don’t own the trail— and it doesn’t owe us safe passage. Respect wildlife and its right to exist undisturbed in its natural habitat.
🐍 Extra Tips for Encountering a Snake on the Trail
✅ 1. Freeze First, Then Back Away Slowly
- Sudden movements may trigger a defensive strike.
- Pause, assess the snake’s posture (coiled and rattling vs. stretched out and calm), and then slowly increase the distance between you and the snake.
👀 2. Watch Where You Step Immediately After
- There may be more than one snake nearby—especially during mating season or in shared shelter spots.
- Scan the trail and surrounding area before moving.
📏 3. Give It a Wide Berth—Minimum 6 Feet
- Even if it looks small or calm, stay at least 6 feet (2 meters) away.
- Some species can strike up to half their body length if provoked.
🚶♂️ 4. Don’t Try to Sneak Around It
- If it’s blocking a narrow trail or crevice, wait it out or turn back. Trying to tiptoe past could surprise it—bad for both of you.
🚫 5. Never Throw Rocks or Use a Stick
- Provoking or trying to scare a snake off rarely works and increases the chance of a bite.
- Let nature take its course—it will likely move on if left undisturbed.
Essential Gear for Rattlesnake Safety
Before you hit the trail, make sure your gear supports rattlesnake safety. The right equipment not only helps you avoid dangerous encounters but also prepares you to respond effectively if one happens. Whether you’re on a short desert walk or a backcountry trek, this checklist includes essential items to help you stay safe and snake-aware.
🧭 Essential Gear for Hiking in Rattlesnake Country
As an Amazon and REI affiliate I may earn a small commission on qualifying purchases at no extra charge to you if you purchase them from my link. Thank you for supporting my blog.
- 🥾 High-Cut Hiking Boots
- Protect ankles and lower legs, where most snakebites occur.
- Optional: Snake gaiters or snake-proof boots for added protection in known high-risk areas.
- 👖 Long Pants
- Thick, loose-fitting fabric adds a barrier against fangs.
- Avoid shorts in brushy, rocky areas.
- 🧰 Trekking Poles or Walking Stick
- Tap the trail ahead of you—especially in tall grass, brush, or around rocks.
- Vibrations alert snakes to your presence.
- 👉🏼Buy at Amazon Trekking Poles
- 🧑🚒 Emergency Communication Device
- 🗺️ Printed Map & Compass (and Know How to Use Them)
- Don’t rely solely on GPS if battery or signal fails.
- Avoid getting lost in snake country or delaying rescue.
- 🧯First Aid Kit (Snakebite-Ready)
- Include:
- Marker to circle bite site and note the time
- Compression bandage (not for tourniquet use)
- Antihistamines for allergic reactions
- Electrolyte tabs for hydration
- 🚫 Skip snakebite kits with suction devices—they don’t work and can make it worse.
- Include:
- 🔋Extra Water and Snacks
- Staying hydrated helps your body manage stress and venom symptoms.
- Increases chances of safely hiking out if needed.
- 🔦 Headlamp or Flashlight
- Rattlesnakes are more active at dawn, dusk, and night.
- Don’t hike in low light without being able to see where you step.
- 👉🏼 Buy at Amazon: Headlamp
- 📱Fully Charged Phone + Portable Charger
- Even if there’s no service, it may still be used with GPS or Emergency SOS via satellite.
- Store emergency contacts and local ranger station numbers.
- 👉🏼 Buy at Amazon: Portable Charger
Rattlesnake Safety Wrap Up
Rattlesnake encounters are rare, but being prepared can make all the difference when they happen. With a few smart precautions, the right gear, and a solid understanding of what to do (and what not to do), you can hike confidently—even in snake country. Rattlesnake safety isn’t about fear—it’s about respect for the environment and taking responsibility for your own well-being on the trail. By staying alert, keeping your distance, and following Leave No Trace principles, you help protect both yourself and the wildlife that calls these places home. Stay calm, tread lightly, and enjoy the wild safely.