Olomana Trail: The Ultimate Adrenaline Fuelled Ridge Hike
If your perfect Oʻahu day includes ridgelines, rope climbs, and dizzying drop-offs, the Olomana trail, also known as Three Peaks, is calling your name. Known as one of the island’s most thrilling—and dangerous—hikes, I was hooked the moment I read about it.
I didn’t think for a second that Craig would match my excitement. I knew he’d think I was crazy—and the rest of the family agreed. No one believed he would attempt it- except me.
When I showed him the photos, he didn’t hesitate.
“Absolutely not,” he said, looking at me like I was certifiably crazy.
Craig had a paralyzing fear of heights. And honestly, I expected his reaction.
But when something feels meant to be, fear doesn’t get the final say.
The Three Peaks were calling—and I wasn’t ready to take “no” for an answer.
TL;DR Olomana Trail (Three Peaks), Oʻahu
A short but intense ridge hike on Oʻahu’s windward side, Three Peaks delivers epic views, heart-pounding climbs, and serious thrills.
- Peak 1 is steep but manageable and offers the best panoramic views—many hikers stop here.
- Peaks 2 and 3 are much more technical, with ropes, drop-offs, and real danger.
- Not recommended for beginners or anyone with a fear of heights.
- Even experienced hikers should not continue past Peak 1 unless the trail is completely dry. The ridgeline becomes extremely slick and dangerous when wet.
⚠️ Safety Warning
This is an advanced, highly technical trail recommended only for experienced hikers. It includes steep drop-offs, narrow ridgelines, and rope-assisted climbs.
At least six people have fallen to their deaths beyond the first peak.
Know your limits. If you’re not 100% confident in your abilities, turn around at Peak 1. The best views are at the first peak—continuing past is not worth risking your life.
Come for the views, stay for the adrenaline—or turn back safely at Peak 1 and still call it a win.

Olomana Trail Overview
Before diving into the details of each individual peak, here’s a quick overview of what to expect on the Olomana Trail as a whole.
Olomana (Three Peaks)
Distance: 7.4 km (4.4 mi)
Elevation gain: 544 m(1600 ft)
Time needed: 3-5 hours
Difficulty: Strenuous and technical, especially Peaks 2 and 3
Trail type: Out and back
Access notes: The trail can be accessed from the intersection of Maunawili Road and Auloa Road off of Pali Highway. There is no parking area at the trailhead
AllTrails Map
The Three Peaks Breakdown
Each peak offers a slightly different experience. Here’s what to expect as you move from the first summit to the third.
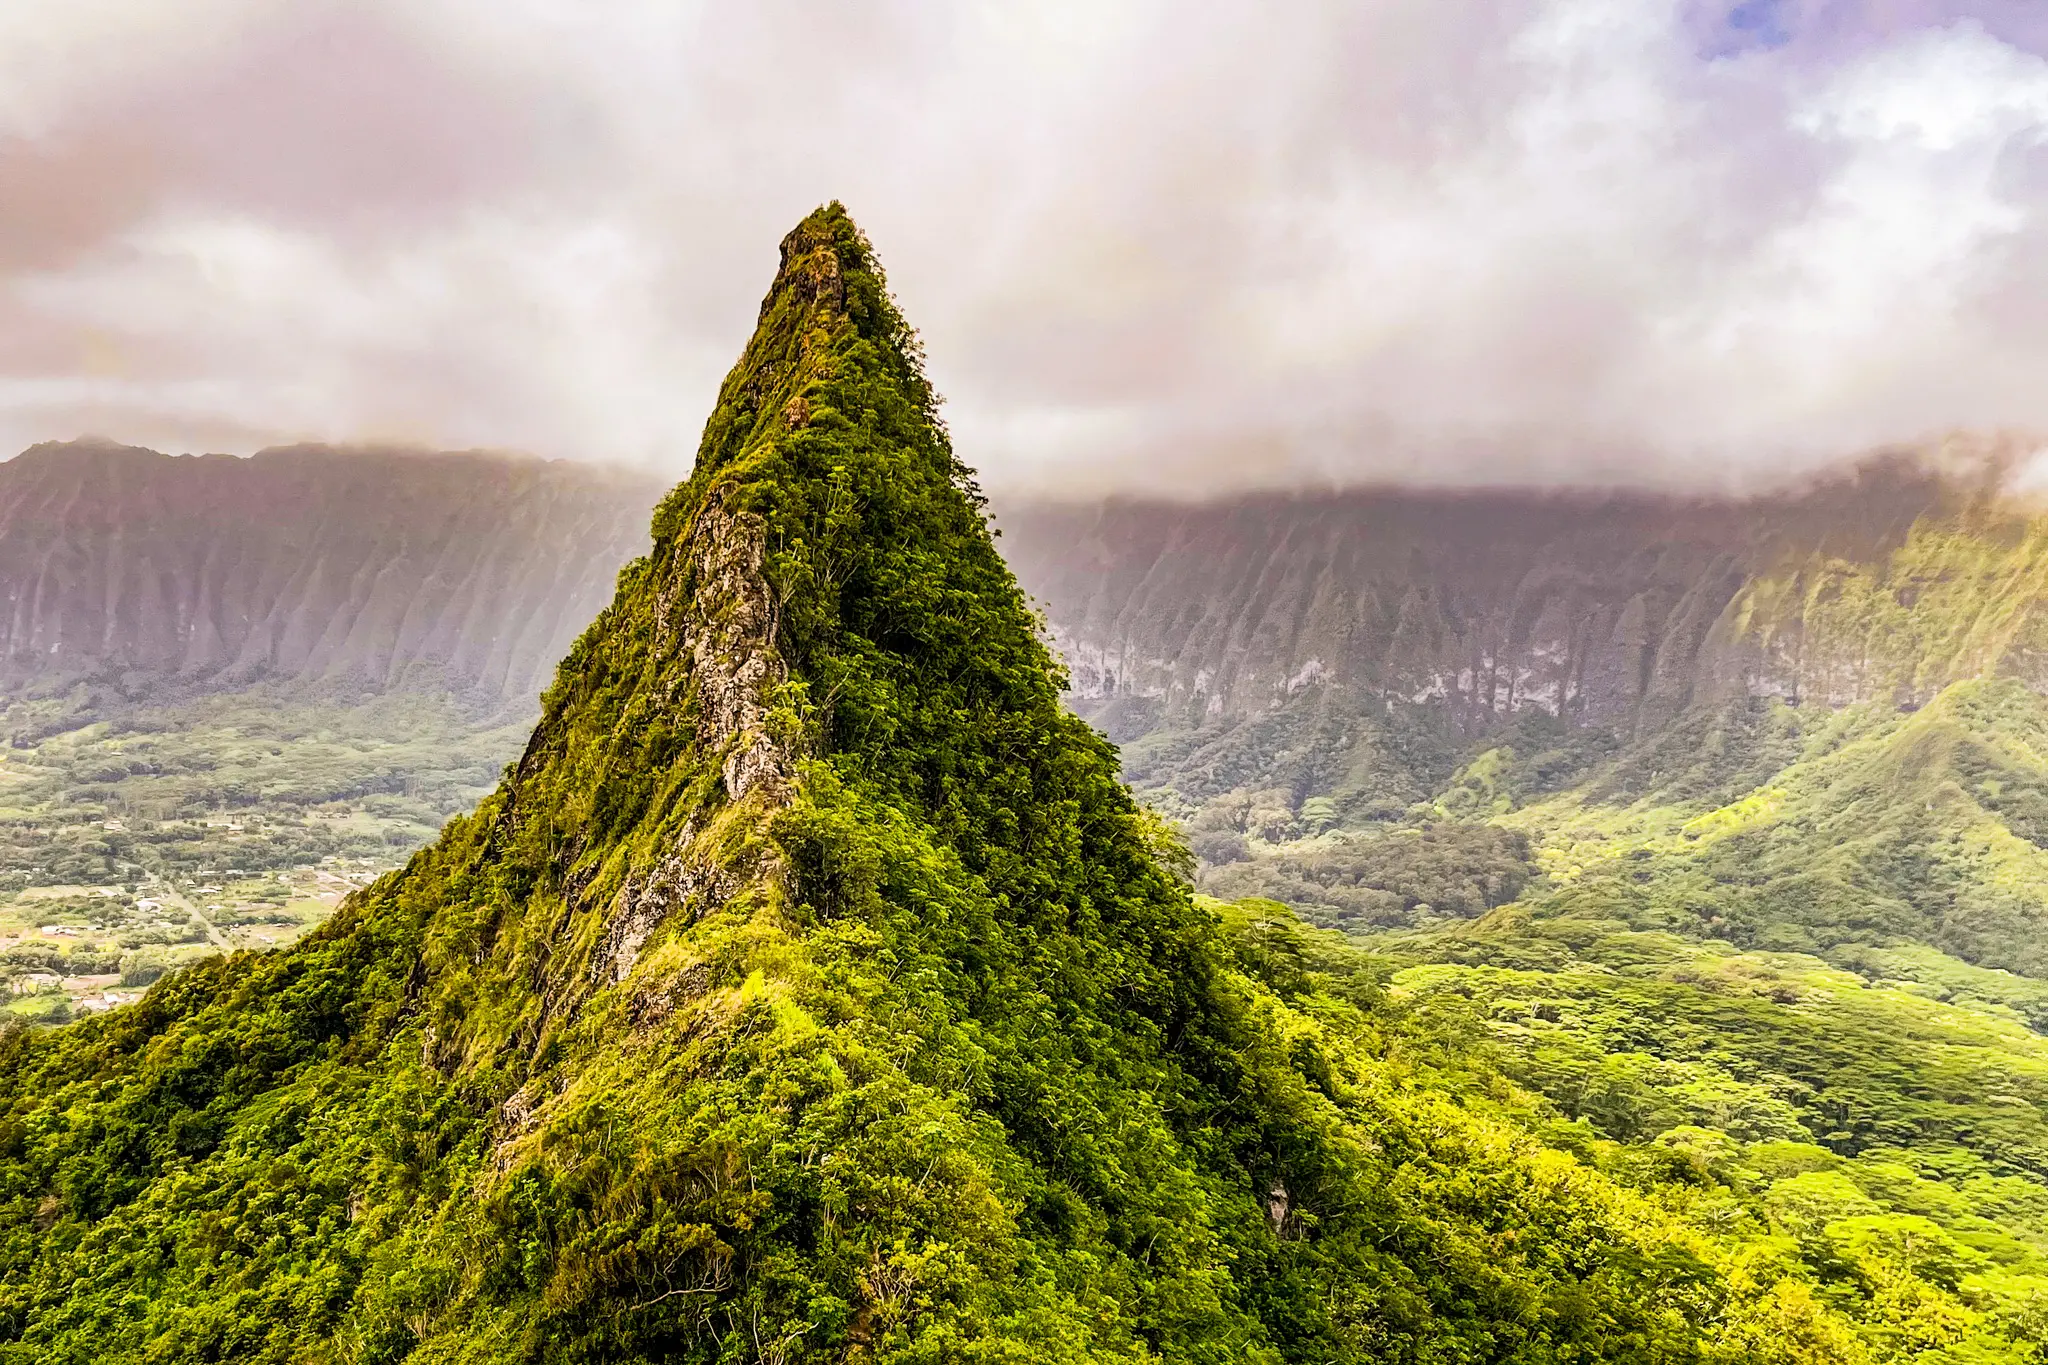
Peak 1 (Olomana)
Peak 1 (Olomana)
Distance: ~ 2.4 km (1.5 mi) one way
Elevation gain: 457 m (1500 ft)
Time needed: ~1.5-2 hours round trip
Difficulty: Moderate; ropes and scrambling
Views: 360° Windward Coast & Koʻolau Mountains
Recommended for: Moderate fitness, no severe fear of heights
⚠️ Best when dry for safety

The first peak is steep, but manageable for most hikers. It includes a few rope sections, some rock scrambling, and a narrow ridge—but nothing too extreme. It was actually our first time doing a rope-assisted hike, and to our surprise, we handled it pretty easily. If you enjoy a bit of technical scrambling without significant exposure, Peak 1 is a lot of fun.

📌 Pro Tip: Always check the security of ropes before trusting them with your full weight.
In sections with multiple ropes, use them all—they’re often placed by other hikers, and not professionally maintained. If one fails, the others could save your life.

Craig and I had agreed before the hike that we’d go as far as the first peak and then evaluate how we felt and assess the trail conditions. I was confident he could make it to Peak 1, and I was fully prepared for him to stop there—which he did. And that’s what most people do.

On the day we hiked, there were 15 people total on the trail. Of those, five of us continued on to the third peak. Everyone else turned back at—or before—the first summit.
The view from the top of Peak 1 is absolutely stunning: a full 360° panorama of the Windward Coast, the sharp green spines of the Koʻolau Mountains, and the turquoise waters near Lanikai. If you only hike to the first peak, you’re still getting the best views and a solid challenge—without the risk that comes with continuing further.
Peak 2 (Paku’i)
Peak 2 (Paku’i)
Beyond Peak 1
Distance: ~0.8 km (0.5 mi)
Elevation gain: 45 m (150 ft)
Time needed: ~45 minutes to 1 hour
Difficulty: Challenging; steep rope climbs, narrow exposed ridges
Views: Close-up views of Peak 1 and Peak 3, dramatic ridgeline perspectives
Recommended for: Experienced hikers confident with exposure and rope-assisted climbing
⚠️ Trail condition: Must be dry — very slick and dangerous when wet
Trail narrows significantly; caution required

The trail to Peak 2 looks intimidating, but it’s surprisingly doable for many hikers who’ve already made it to Peak 1. The descent starts steep and scrambly, with a few rope sections and a narrow ridgeline—but the exposure is manageable if you stay focused and take your time.
Unless you have a serious fear of heights, Peak 2 is within reach. The trail itself isn’t overly technical; it’s the mental game that makes it feel intense. For the curious, adrenaline-driven, or pride-motivated hiker, Peak 2 delivers just enough thrill to feel like a real accomplishment—without pushing into full-blown danger territory
Peak 3 (Ahiki)
Peak 3 (Ahiki)
Beyond Peak 2
Distance: ~ 0.5 km (0.3 mi)
Elevation gain: 45 m (150 ft)
Time needed: 45 mins to 1 hour
Difficulty: Extremely challenging and technical; vertical rope climbs, very exposed, loose footing
👀 Views: Remote, dramatic vistas of the entire ridgeline and coastline
⚠️⚠️⚠️
Recommended for: Only highly skilled, fearless hikers with climbing experience
Trail condition: Must be dry — extremely dangerous when wet
Highest risk section; multiple fatalities reported
The trail to Peak 3 is where the challenge intensifies, starting with a steep, rope-assisted descent right off the second summit. Many hikers consider this section the hardest of the entire route. It’s technical, exposed, and extrememly steep.

But for me, the most unnerving moment came a little later, during the climb up to Peak 3. There’s a short, rope-assisted section where there’s absolutely nothing beneath you—no ledge, no slope, just open air. You’re entirely dependent on the rope, which makes the moment not just mentally intense, but undeniably dangerous. I didn’t struggle physically with the climb, but the thought of what a slip—or a rope failure—would mean definitely gave me pause.
Fortunately, one of the hikers who had passed me earlier was at the top when I approached and offered some encouraging words. Another reminder of one of my favourite parts of hiking-the community that forms on the trail. Strangers meet and connect through the shared beauty, challenge, and wonder of the rugged path they walk together. In brief, powerful moments, we offer encouragement and care to others who answer the same call to seek out God’s most beautiful and remote places.

After that climb, the rest of the trail to the summit is surprisingly mellow. Peak 3 is wild, remote and deeply rewarding—but this section of trail demands serious respect, and should only be attempted by hikers who are prepared both mentally and physically.
What to Know Before You Go
Before you head out, there are a few important logistics to keep in mind. From parking and trail access to sun exposure and gear, a little preparation will make this hike smoother and safer.
Where to Park
- Best spot: Along Auloa Road, just off the Pali Highway intersection. Look for the small dirt shoulder—aim to park fully off the asphalt (even partially on it can get you ticketed).
- Avoid Loop Road: Parking here or anywhere on the golf course driveway is illegal—expect to be towed or ticketed.
- Neighborhood parking: There’s minimal parking in nearby residential streets—only if fully off paved sidewalks .
- Walk-in required: From where you park on Auloa Road, it’s about a 0.8 to 1.3 km walk (0.5–0.8 miles) along Loop Road to reach the actual trailhead near the golf course guardhouse.
Snacks & Fuel: Don’t Underestimate the Climb
The Olomana Trail may be short in distance, but it’s steep, exposed, and energy-draining. Between the sustained ascent to Peak One and the mentally demanding rope sections beyond, you’ll burn more energy than you expect.
Bring quick, easy-to-eat snacks that provide both carbs and a bit of protein, such as:
- Trail mix or nuts
- Energy bars
- Dried fruit
- Electrolyte chews
- Sandwich halves or wraps
Even if you’re only planning to hike to Peak One, fuel matters. If you continue to Peaks 2 and 3, you’ll want steady energy and clear focus — especially for technical sections.
If you’re unsure what to pack, I share exactly what to eat before, during, and steep climbs in my post on hiking fuel for high elevation.
Heat & Sun Advisory
- Wear sunscreen, a hat, and bring plenty of water—there are no refill points on the trail.
- The trail is mostly exposed, especially after the first 15 minutes.
- Very limited shade past the initial forest section—Peak 1 and beyond are in full sun.
- Start early to beat the heat and avoid dehydration.
Optional but Helpful Gear
- Gloves for rope-assisted climbs (gardening or gym gloves with grip work well)
- Trekking poles for stability, especially on the descent
- GPS or hiking app (especially useful past Peak 1)
- Small first aid kit for scrapes, blisters, or rope burns
Weather Warning
Do not attempt this trail in wet conditions. The terrain becomes extremely slick and dangerous when muddy, especially past the first peak.
No Dogs Allowed
Dogs are not permitted on the Olomana Trail. The terrain is steep, exposed, and involves rope-assisted climbs that are unsafe for pets. Please leave your furry friends at home for this one.
Hike Responsibly
Please remember to Leave No Trace and respect the ʻāina (land). Stay on the trail, pack out everything you bring in, and be mindful of local wildlife and cultural sites.
👉 Learn the 7 Leave No Trace Principles
Is the Olomana Trail Worth It?
For adventure-seekers and confident hikers — absolutely.
Olomana is one of the most iconic hikes on Oʻahu, known for its narrow ridgelines, panoramic views, and choose-your-own-adventure intensity.
- Peak 1 offers the best of both worlds: breathtaking scenery and a moderately challenging ascent, with a few scrambles that add just enough thrill — without the high-risk exposure of the later peaks. It’s the perfect summit for hikers who want big rewards without extreme risk.
- Peaks 2 and 3, on the other hand, are where the adrenaline truly kicks in. These sections involve steep descents, rope-assisted climbs, narrow ridges, and high exposure. For experienced climbers and serious thrill-seekers, they offer a heart-racing challenge and unmatched bragging rights — but this route is best left to the bold and surefooted.
If you’re chasing unforgettable views and a bit of adventure, Peak 1 delivers.
If you crave an adrenaline rush and know how to manage risk, Peaks 2 and 3 will push your limits — but proceed with caution, and know when to turn back.