Why Layering Matters for hiking (and Not Just Cold Weather)
Five hours into New Zealand’s 19.4-kilometre Tongariro Alpine Crossing, we weren’t just wet — we were soaked all the way through. It had been raining nonstop since our first step onto the trail. We didn’t have proper waterproof or outer layers, and there was no way to dry off or warm up. Toward the end of the hike, Joshua began having difficulty reading trail signs; the letters blurred and shifted, making it hard for him to focus. It was a quiet but unmistakable sign that prolonged cold, rain, and fatigue were affecting more than just our comfort. That experience fundamentally changed how I think about how to layer clothes for hiking and backpacking.
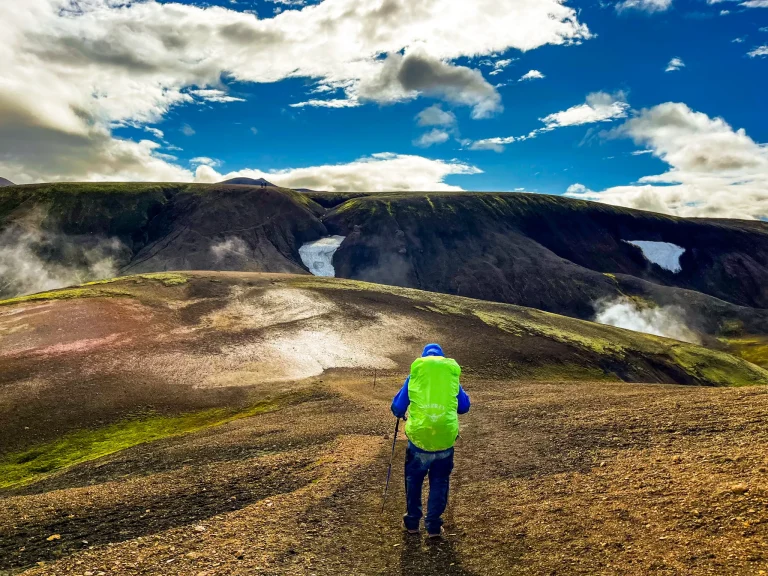
Years later, I remembered those lessons when I started planning our Laugavegur–Fimmvörðuháls combo trek. We faced similarly unpredictable weather, but with a very different outcome. The day began in perfect t-shirt weather, shifted into light rain, then turned into hours of driving rain with strong, gusting wind and limited visibility — before finally settling into calm, overcast skies. Proper layering allowed us to adapt through every stage while staying dry to the last step.
Those two experiences shaped how I think about clothing on the trail. Learning how to layer clothes for hiking isn’t about chasing the perfect jacket, but it does depend on having the right layers for the conditions. Without reliable waterproof protection or adequate insulation, your experience is far more likely to resemble Tongariro than Fimmvörðuháls — cold, uncomfortable, and difficult to recover from once you fall behind the conditions.
This post explains how layering works in a practical, reusable way — one system you can apply to almost any trail. It’s designed to give you a clear framework that works across changing weather, seasons, and regions. You can see how this layering system plays out in cold, wet conditions in my Laugavegur packing list, where wind, rain, and limited drying time shape every clothing decision.
Within the rest of my backpacking content, this guide acts as a foundation. My Backpacking Essentials packing list stays intentionally broad, focusing on clothes and gear necessary for any trail. Meanwhile trail-specific packing lists focus on how this layering approach applies to individual hikes. Once you understand the basics here, planning what to wear becomes far simpler — and far more reliable.
TL;DR — How to Layer Clothes for Hiking
- ✔ Base Layer: Manages moisture next to your skin
- ✔ Hiking Layer: What you actually hike in most of the day
- ✔ Lightweight Mid Layer: Adds warmth while you’re moving
- ✔ Insulating Mid Layer: Holds warmth when you stop
- ✔ Outer Layers: Protect you from wind and rain
Each layer has a single job. Comfort comes from adding or removing layers as conditions and effort change, not from wearing everything at once.
One system rule: avoid cotton anywhere in your layering system. It holds moisture, dries slowly, and makes temperature control harder as conditions change.
Base Layer: Managing Moisture Next to Skin
The base layer sits directly against your skin, and its primary job is moisture management. It moves sweat away from your body so it can evaporate, helping you stay comfortable as effort, temperature, and conditions change.
A base layer doesn’t need to provide warmth. Its value is in how it handles moisture over time. When sweat stays trapped against your skin, it becomes much harder to stay warm once you slow down, stop, or encounter wind. When moisture is managed well at this level, every other layer in your system works more effectively.
Merino vs Synthetic
Most base layers fall into one of two categories: merino wool or synthetic fabrics. Both are designed to be worn next to skin, but they behave differently in terms of drying speed, odour control, durability, and comfort over multiple days.
⚖️ Merino vs Synthetic Base Layers
Merino Wool
✔️ Naturally odour-resistant — can wear multiple days without smelling
✔️ Soft and comfortable next to skin
✔️ Regulates temperature well in both warm and cool conditions
❌ More expensive
❌ Slower to dry when soaked
❌ Less durable; prone to pilling or holes over time
Synthetic (Polyester, Capilene, etc.)
✔️ Dries very quickly, even when wet
✔️ Lightweight and durable — holds up to frequent use and washing
✔️ Often cheaper than merino
❌ Can retain odors more quickly
❌ Less temperature-regulating in cold weather compared to merino
Bottom Line:
- Merino = comfortable, odour-resistant, natural warmth, but delicate and pricier
- Synthetic = fast-drying, tough, and budget-friendly, ideal for wet or muddy conditions
If you’re just getting started, you don’t need specialized gear right away. Lightweight athletic tops or leggings made from synthetic fabrics you already own can work as basic base layers, especially for day hikes or mild conditions. As trips get longer, wetter, or colder, the differences between purpose-built base layers become more noticeable.
There isn’t a single “best” choice. Merino tends to be more comfortable over multiple days without washing, while synthetic fabrics dry faster and handle repeated moisture more predictably. Which works better depends on trip length, drying opportunities, and how forgiving you need your system to be.
ℹ️ TL;DR — Base Layer
- Best use: Moving moisture away from your skin to stay comfortable while active
- What to look for: A next-to-skin layer that manages moisture well and suits the length and conditions of your trip
Hiking Layer: What You Actually Hike In
The hiking layer is your everyday clothing on the trail — the pants, shorts, and shirts you spend most of the day wearing while moving. Unlike insulation or shells, this layer isn’t about extreme warmth or weather protection. Its job is comfort, durability, and breathability over long hours of movement.
This typically includes hiking pants or shorts and a hiking shirt, worn either directly against your skin or over a base layer, depending on conditions. In warm or mild weather, many hikers skip a dedicated base layer altogether and wear a lightweight hiking shirt as their next-to-skin layer. In cooler conditions, the hiking layer sits on top of a moisture-managing base layer and underneath mid or outer layers as needed.
What matters most in a hiking layer is how it performs over time. Fabrics should allow airflow, dry reasonably quickly, and remain comfortable when damp. Durability also matters here — this is the layer that deals with brush, rock, dirt, sweat, and constant movement.
The hiking layer works closely with the rest of your system. In heat, it may be the only layer you wear. As temperatures drop or conditions change, warmth and protection are added over it. Because it’s worn for much of the day, comfort and fit matter more here than anywhere else.
ℹ️ TL;DR — Hiking Layer
- Best use: Everyday comfort and durability while moving on the trail
- What to look for: Breathable, quick-drying clothing that stays comfortable over long days of movement
Mid Layer: Regulating Warmth
Mid layers add warmth and flexibility as conditions change. On the trail, this often shows up as two distinct types of layers — lighter warmth for movement, and warmer layers for slower or exposed moments.
Lightweight Mid Layer (Fleece or Hoodie)
The lightweight mid layer provides active warmth — enough insulation to stay comfortable while moving, without trapping heat or moisture. It sits between your base layer and insulation and is most often worn during cool or variable conditions while hiking.
This type of mid layer includes lightweight fleece, grid fleece, thin synthetic tops, or even a simple sweatshirt or hoodie you already own. The key isn’t what it’s called, but how it behaves: it should add warmth while still allowing heat and moisture to escape.
This is where many layering mistakes happen. If a mid layer is too warm or doesn’t breathe well, you’ll start sweating early. That moisture then works against you later when temperatures drop, wind picks up, or you stop moving. The goal of a mid layer isn’t maximum warmth — it’s steady comfort while you’re active.
Breathability and adjustability matter just as much as warmth. Full-zip mid layers are the easiest to regulate, allowing you to vent heat quickly on climbs without stopping to remove a layer. Partial-zip (¼ or ¾ zip) tops still offer some venting, but usually require more frequent on-and-off adjustments. Sweatshirts or hoodies can work as mid layers, especially if that’s what you already own, but they’re harder to fine-tune — once you’re too warm, your only real option is to take them off.
Used well, a mid layer helps limit overheating and allows moisture to move away from your skin, which keeps your base layer drier and makes the rest of your layering system more effective.
ℹ️ TL;DR — Lightweight Mid Layer
- Best use: Adding warmth while moving in cool or changing conditions
- What to look for: Breathability and adjustability first, with just enough warmth to stay comfortable without sweating
Insulating Mid Layer (Puffy Jacket)
The insulating mid layer helps you stay warm when your body isn’t producing much heat. This usually happens when you stop moving, slow down, or spend time in cooler, windier places.
For most hikers, this layer is a puffy jacket filled with down or synthetic insulation. This type of jacket traps warmth very efficiently and gives you a lot of heat without much bulk. It’s not meant for hard climbing or fast hiking, but it’s essential for staying comfortable when movement slows.
Insulation is often used during breaks or at camp, but it can also make sense while hiking in the right conditions. On exposed ridge walks, windy plateaus, or cool descents, your pace is often slower and the wind can pull heat away quickly. In dry, cool weather, wearing insulation while moving can be the most comfortable option — especially if you don’t have a strong mid layer.
In calm, dry conditions, insulation can be worn on its own as an outer layer. If wind picks up or rain moves in, adding a shell over top helps protect that warmth and keeps the insulation dry.
If you don’t own a puffy jacket yet, a thicker fleece, a heavy hoodie, or layering two mid layers together can work in milder conditions. These options are bulkier and don’t hold heat as well, but they’re a reasonable starting point if you’re using what you already have.
ℹ️ TL;DR — Insulating Mid Layer
- Best use: Retaining warmth during breaks, at camp, or anytime movement slows
- What to look for: An insulating layer that fits over base and mid layers, works under a shell when needed, and matches the moisture risks of your conditions
Outer Layers: Managing Wind and Rain
When weather turns uncomfortable on the trail, it’s usually wind or rain that gets there first. Your outer layer needs to be windproof, waterproof, and breathable. It doesn’t add warmth on its own; it protects the warmth created by the layers underneath while allowing excess heat and moisture to escape. This includes your jacket, rain pants, and any outer gloves or over-mitts designed to block wind and rain.
Wind strips heat quickly, even in dry conditions. Rain makes it difficult to warm back up by soaking clothing and collapsing insulation. At the same time, a shell that doesn’t breathe traps sweat inside, leaving you damp and chilled even after the weather improves.
A reliable shell gives you breathing room when conditions change. It might only be worn briefly, but adding it early — before you’re cold or wet — helps regulate heat and moisture while protecting you from wind and rain. Conditions change faster than plans, and solid wind and rain protection paired with breathability is often what keeps a manageable day from turning miserable.
ℹ️ TL;DR — Outer Layers
- Best use: Protecting from wind and rain while allowing heat and moisture to escape
- What to look for: A shell that is windproof, waterproof, breathable, and easy to put on before you’re cold or wet
🥾 Get Organized for Your Next Backpacking Trip
Whether you’re just getting started or ready to dive deep, we’ve got tools to help you get trail ready.
How the Layers Work Together
Layering works because each piece does one specific job, and those jobs overlap as conditions change. No single layer is meant to handle everything on its own. Comfort comes from using the layers together — and adjusting them as your effort, exposure, and weather shift throughout the day.
Most hikes start cool. You might begin moving with a base layer, hiking layer, and possibly a mid layer or shell. As your body warms up, layers often come off quickly. Removing warmth early helps prevent sweating, which is much harder to manage later once moisture builds up.
As effort increases — especially on climbs — the priority is staying dry. This is usually managed by shedding mid layers first and venting or removing outer layers if conditions allow. The goal isn’t to stay warm at all times, but to stay just cool enough while moving.
When conditions change, layers go back on. Wind, rain, cloud cover, or exposed terrain can pull heat away quickly, even if the air temperature hasn’t dropped. Adding protection early helps preserve warmth and keeps small discomforts from compounding.
When you stop moving — for breaks, meals, or at the end of the day — insulation becomes critical. This is when heat loss happens fastest. Adding an insulating layer promptly helps you hold onto warmth you’ve already generated, rather than trying to regain it later.
On multi-day trips, layering often shifts again at camp. Damp hiking layers come off, dry layers go on, and insulation becomes the primary source of warmth for the evening. How comfortable you feel at camp is often a reflection of how well you managed moisture and temperature during the day.
One system-wide rule applies across every layer: avoid cotton. Cotton holds moisture, dries slowly, and continues to pull heat away from your body once wet. No matter where it sits in the system, cotton makes it harder to manage temperature and moisture when conditions change.
Layering isn’t about wearing everything you brought. It’s about making small adjustments before discomfort sets in, staying ahead of moisture, and letting each layer do its job when it’s needed.
To help you remember the key layering concepts, use Appalachian Club’s W.I.S.E layering (wicking, insulating, sheltering, and extra layers).
Understanding layering as a system is what makes it adaptable. The same principles apply in every environment, even when conditions look nothing alike. You can see how this approach shifts for heat, sun exposure, and canyon hiking in my Havasupai packing list, where clothing choices look very different than they do in Iceland, even though the underlying logic stays the same.
Common Layering Mistakes
Most layering problems don’t come from missing gear — they come from timing and expectations. These are some of the most common mistakes hikers make, even when they have the right layers with them.
Starting Too Warm
It’s tempting to put everything on at the trailhead, especially if it’s cold or windy. The problem is that you’ll usually start sweating within the first few minutes. That moisture is hard to deal with later. Feeling a little cool at the start is normal — your body will warm up once you’re moving.
Waiting Until You’re Cold to Add a Layer
The opposite mistake is waiting too long. Once you’re cold, wet, or uncomfortable, it’s much harder to warm back up. Adding a layer early — when the wind picks up, clouds roll in, or you stop for a break — helps you stay ahead of the problem instead of chasing it.
Treating Layers as Fixed
Layering isn’t something you set once and forget. Conditions, terrain, and effort change throughout the day, and your clothing should change with them. If you go hours without adjusting anything, it often means you’re slowly overheating or gradually getting chilled.
Ignoring Sweat
Sweating isn’t just uncomfortable — it creates moisture that works against you later. If you notice yourself sweating, it’s usually a sign to slow down, vent, or remove a layer rather than push through. Managing sweat early is much easier than dealing with damp clothing afterward.
Assuming Insulation Is Only for Camp
Many hikers think insulation is only for breaks or evenings. In reality, it can also be useful while hiking in dry, cool, exposed terrain where your pace is slower and heat loss is higher. The key is paying attention and adjusting if you start to overheat.
Expecting One Layer to Do Everything
No single layer can handle warmth, wind, rain, and moisture all at once. Trying to make one piece do everything usually leads to compromises somewhere else. Layering works because each layer has a clear job — and because you’re willing to adjust as conditions change.
Final Thoughts on Layering for Hiking
Learning how to layer clothes for hiking isn’t about owning the perfect jacket — it’s about understanding how each layer works and adjusting as conditions changes. When you know what each layer is meant to do, clothing decisions become simpler and far more reliable.
Weather, effort, and terrain change— often faster than we expect. A good layering system gives you the flexibility to respond without stress, helping you stay comfortable, safe, and present on the trail rather than distracted by discomfort.
There’s also a quiet humility in layering well. It reminds us that we don’t control the mountains, the weather, or the day ahead. We simply prepare as best we can and adapt as the day unfolds. With a little foresight, attentiveness, and respect for the conditions we’re given, we’re better able to enjoy the places we’ve been blessed to explore.
Once you understand the system, you can apply it anywhere — from short local hikes to long, remote adventures. The goal isn’t perfection, but preparedness — and the freedom that comes from knowing you can handle whatever the trail brings.