Complete Havasupai Packing List
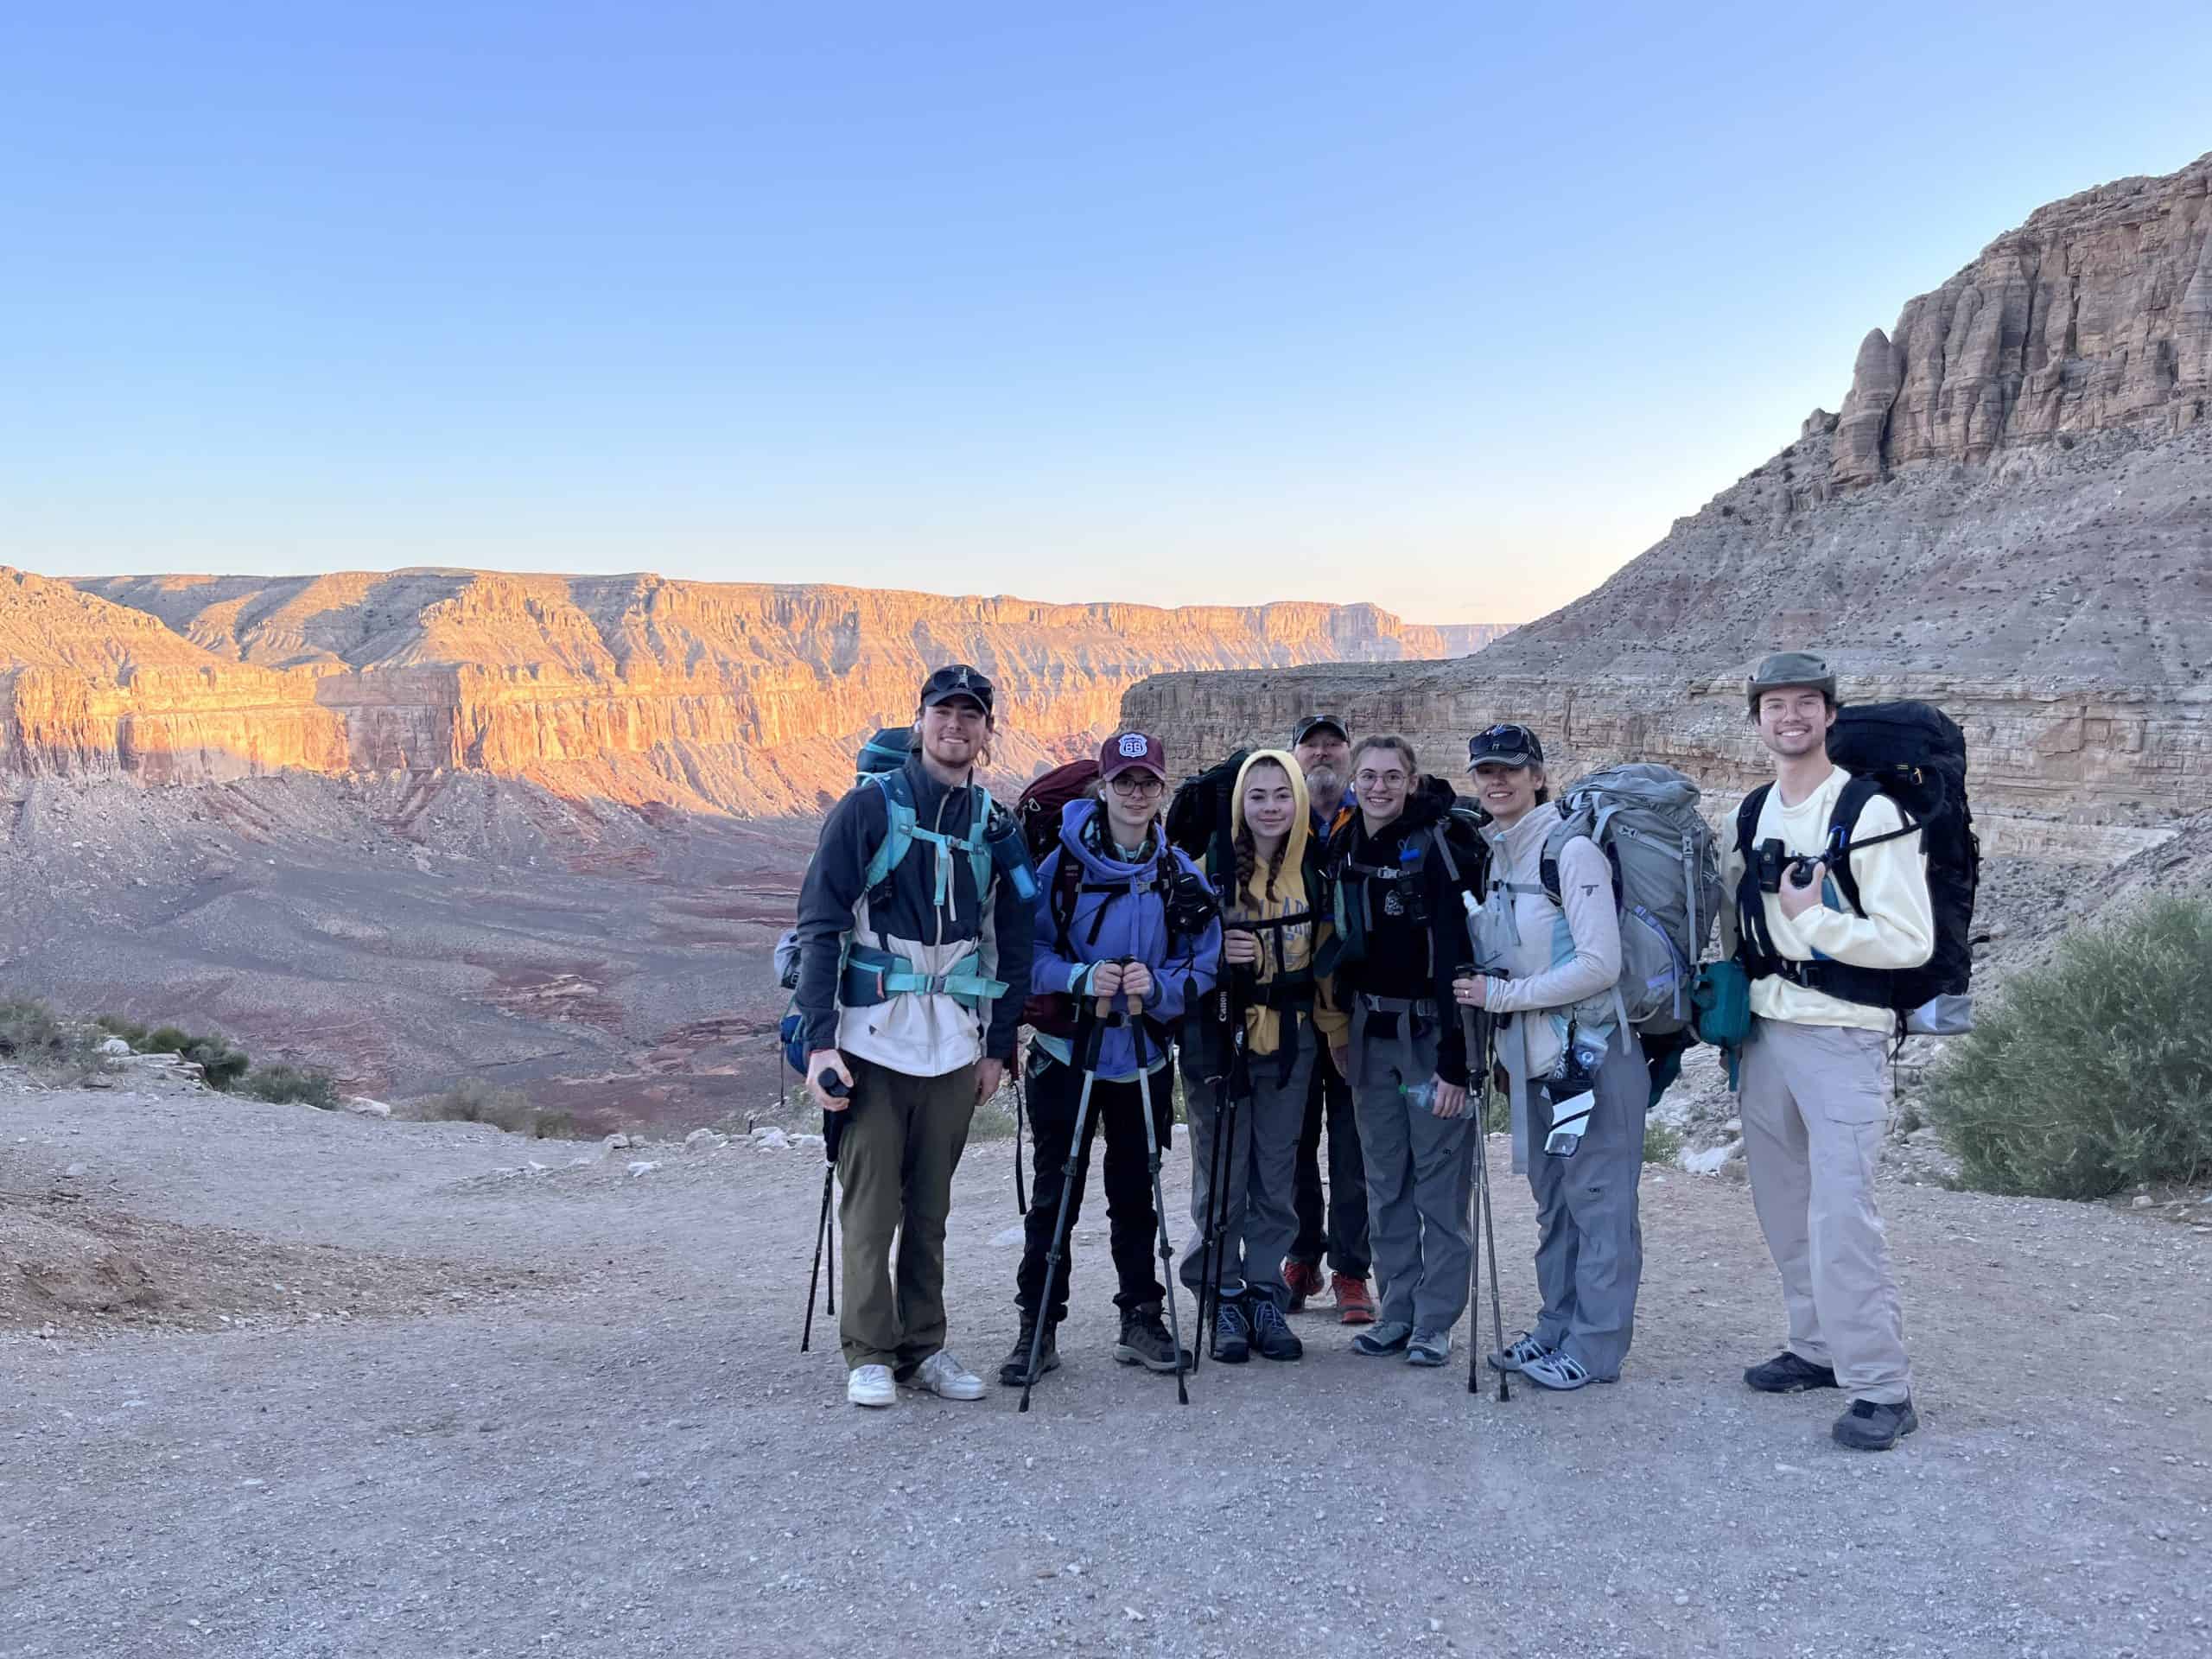
Before we left for our Havasupai trip, I sent everyone a packing list. Some followed it exactly; some added items to it; some skipped things altogether. Everyone came out of the canyon with a short list of what they’d do differently next time.
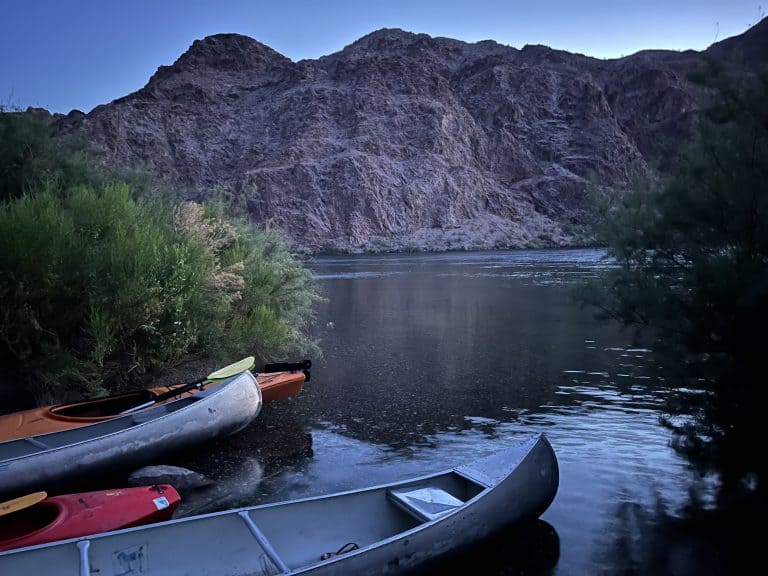
Our first stop after hiking out? REI. We had less than 24 hours before our next adventure, canoeing and kayaking the Black Canyon Water Trail, and everyone picked up a few upgrades we wished we’d had in Havasupai.
This packing list reflects that experience: the gear we packed and loved, what we didn’t use, and what we wished we’d brought. Many core items—like our backpack, shelter, sleep system, and cooking gear—stay the same no matter where we’re backpacking. If you’re looking for a full breakdown of those universal backpacking systems, you’ll find that in my Backpacking Essentials guide.
What this post focuses on instead is how those same pieces of gear play out specifically at Havasupai—along with the trail-specific considerations that actually change, from heat and water to side hikes and seasonal conditions.
How hard this hike feels is closely tied to what you carry and how prepared you are. If you’re still deciding whether Havasupai is within your comfort zone, we break down the trail difficulty, including how challenging it is for beginners in our guide How Hard Is Havasupai?.
🥾 Free Havasupai Packing Checklist
If you want a quick way to double-check your gear, this free Havasupai packing list pulls the essentials into one simple checklist. It’s designed to help you feel trail ready without worrying about missing something.
This post contains affiliate links, meaning if you purchase them after clicking on my link, I may earn a small commission. I only recommend items that I personally use and love or that I think will add value to your trip. Thank you for supporting my blog.
Carrying System
These are the must-haves—the gear you absolutely need to make it in and out of the canyon safely and comfortably. You don’t want to skip on these items! Havasupai is remote and rugged, so packing smart from the start makes all the difference.
Backpack
A standard multi-day backpack works well for Havasupai. In summer, packs with good back ventilation are noticeably more comfortable in the canyon heat, especially on the long climb out.
Top Picks
- Women’s Osprey Aura 65 L 👉 Buy at: Amazon USA | Amazon Canada | REI
- Men’s Osprey Atmos 65 L 👉 Buy at: Amazon USA | Amazon Canada | REI
Budget Alternative
- Women’s Osprey Renn 65 L 👉 Buy at: Amazon USA | Amazon Canada | REI
Daypack
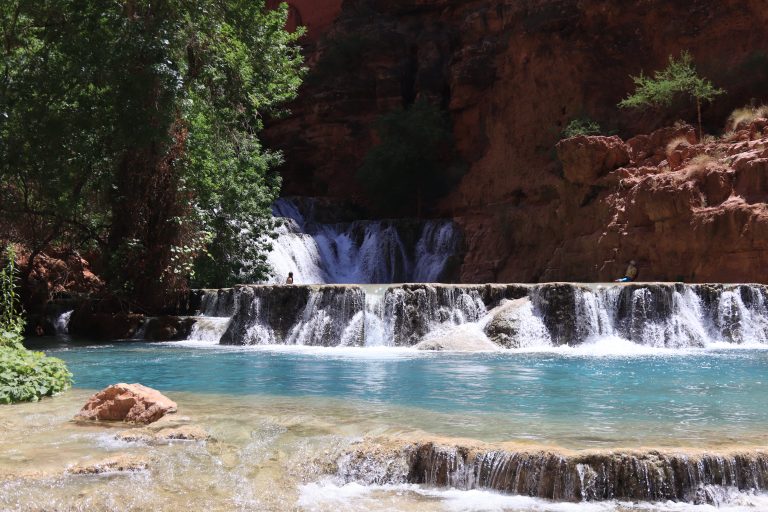
Once you arrive at camp, you’ll want a lightweight daypack for hiking to Beaver Falls, Mooney Falls, or even all the way to the Havasupai Confluence—without lugging your full backpacking setup
Top Pick
- Osprey Tempest Velocity (20 or 30 L)
- Black Diamond Distance 22 👉 Buy at: Amazon USA | Amazon Canada | REI
Budget Alternative
- Nevo Rhino Backpack with Bladder 👉 Buy at: Amazon USA | Amazon Canada
- Bonus- This daypack includes a Nevo Rhino 3 L hydration bladder
Shelter System
Tent
While daytime temperatures are often warm, late fall and early spring nights can be much colder, particularly in shaded canyon sections. For warmer conditions, a tent with a fully removable rain fly allows for significantly better airflow and ventilation, which helps with heat and condensation on mild nights.
Top Picks
- Big Agnes Copper Spur 👉 Buy at: Amazon USA | REI
- Footprint (optional, but highly recommended)
- 👉 Buy at: Amazon USA | REI
- Hubba Hubba (our choice) 👉 Buy at: Amazon | REI
- Footprint (optional but highly recommended)
- 👉 Buy at: Amazon USA | Amazon Canada
Budget Alternative
- Naturehike Cloud Up Tent 👉 Buy at: Amazon USA | Amazon Canada
Hammocks
Hammocks are a common and popular option at Havasupai, especially near the creek where tree cover is more reliable. Many hikers prefer them for comfort and airflow during warmer months.
If you plan to use a hammock, a rain tarp is essential, as storms can move through the canyon quickly even when forecasts look clear. A mosquito net or fully enclosed hammock is also important, both for insects and to prevent unwanted encounters with scorpions at night.
In late fall and early spring, cooler overnight temperatures become a bigger factor, and hammock setups may require additional insulation or weather protection to stay comfortable.
📌 Pro Tip: Not all campsites are equally hammock-friendly. Arriving earlier in the day gives you a better chance of finding suitable tree spacing.
Sleep System
Sleeping Bag
Sleeping bag choice at Havasupai comes down almost entirely to the season you’re visiting.
- Late spring through early fall: Most hikers are comfortable with a lightweight summer sleeping bag or quilt. During the hottest months, some hikers choose to sleep with only a sleeping bag liner instead of a full bag.
- Late fall & early spring: Overnight temperatures are cooler, and a warmer spring/fall (cold-weather) sleeping bag is usually the better choice.
- Flexibility: A sleeping bag liner can extend the range of a lighter bag.
Top Picks
- Naturehike (summer bag) 👉 Buy at: Amazon USA | Amazon Canada
- REI Co-op Magma 30 (fall/spring bag) 👉 Buy at: REI
- Sleeping Bag Liner (optional) 👉 Buy at: Amazon USA | Amazon Canada
Budget Alternatives
- QEZER Down Sleeping Bag (Options for all seasons)
- 👉 Buy at: Amazon USA | Amazon Canada
- Note: We haven’t used this one personally, but the reviews and specs look good on it
Sleeping Pad
Sleeping pad needs at Havasupai are primarily season-dependent.
- Late spring through early fall: A standard sleeping pad is sufficient for most hikers.
- Late fall & early spring: Cooler nights make a more insulated sleeping pad noticeably more comfortable, especially for cold sleepers.
- Hammock users: An underquilt or insulated pad may be needed during cooler seasons to prevent heat loss overnight.
Top Picks
- NEMO Tensor All Season Sleeping Pad
- 👉 Buy at: Amazon USA | Amazon Canada | REI
- Big Agnes Sleeping Pad
- 👉 Buy at: Amazon USA | Amazon Canada | REI
Budget Alternative
- Aksoul Sleeping Pad 👉 Buy at: Amazon USA | Amazon Canada |
- This worked for our first backpacking trip, but we upgraded it before we did our second trip.
Repair Kit
Every trip should include a basic repair kit.
- Tent peg splints for bent or broken stakes
👉 Buy at: Amazon USA | Amazon Canada - Fabric repair tape for small tears in tents, packs, or clothing
👉 Buy at: Amazon USA | Amazon Canada - Sleeping pad patch kit for air pad leaks
- 👉 Buy at: Amazon USA | Amazon Canada
Optional Sleep System Add ons
Pillow
A purely comfort addition, but it could make a big difference to your sleep at night.
Top Pick
- Nemo Filo 👉 Buy at: Amazon USA | Amazon Canada | REI
Budget Alternative
- Hikeventure Ultralight Pillow 👉 Buy at: Amazon USA | Amazon Canada
🥾 Complete Havasupai Planner
Ready to start planning your Havasupai trip?
Take the stress out of planning with our Havasupai Backpacking Planner. It’s packed with pre-filled templates, checklists, and real trail info—designed specifically to help you stay organized, confident, and trail-ready.
Mini Pump
Not an essential since most pads come with a pump sack, but it does make the process quicker and easier, and it’s super light, taking up almost no space in your pack.
- Flextail Pump 👉 Buy at: Amazon USA | Amazon Canada
Cooking System
Cooking at Havasupai is typically done at camp rather than on the trail. A simple, reliable setup is all that’s needed—enough to prepare hot meals or drinks without adding unnecessary bulk or complexity.
The Essentials
These are the core items needed for basic camp cooking and hot drinks. This setup covers most backpackers who are preparing store bought freeze dried meals and want something quick, efficient, and easy to use at the end of the day.
Top Picks
- Jetboil Stove 👉 Buy at: Amazon USA | Amazon Canada | REI
- Jetboil Java (if you need your morning coffee)
- 👉 Buy at: Amazon USA | Amazon Canada | REI
- Thermos Stainless King Vacuum-Insulated Food Jar
- 👉 Buy at: Amazon USA | Amazon Canada
- Sea to Summit Long Handled Spork
Budget Alternative
- Zlwena camp stove 👉 Buy at: Amazon USA | Amazon Canada
- Kuvik Titanium Spork 👉 Buy at: Amazon USA
- This item is only a budget option for American shoppers as it is similar price to the Sea to Summit version on Amazon.ca
Optional Cookware
Optional cookware items can make meals more comfortable or flexible, especially for group trips or homemade meals. These aren’t required, but can be worth bringing if you enjoy cooking at camp or sharing meals.
Top Picks
- Sea to Summit Ultralight Collapsible pot 👉 Buy at: Amazon Canada | REI
- Sea to Summit Ultralight 8″ pan 👉 Buy at: Amazon Canada | REI
- Frying Pan Support Attachment (optional)
- 👉 Buy at: Amazon USA | Amazon Canada | REI
- Some stoves (like Jetboil) need pan supports for cooking in a pot or frying pan.
- Suclain 4 Pcs Collapsible Bowls with Lids
- 👉 Buy at: Amazon USA | Amazon Canada
- Silicone Go Cup 👉 Buy at: Amazon USA | Amazon Canada | REI
Budget Alternative
- MalloMe Camping Cookware 👉 Buy at: Amazon USA | Amazon Canada
- Note- We haven’t used this set, but it looks like it would be ok for a budget, starter set.
Food
Dehydrated Meals & Snacks
Aim for high-calorie, high protein, low-bulk foods that are easy to prepare and carry.
🍲 Meal Brands We Love:
- Peak Refuel – High protein and great flavor
- Mountain House – Reliable classics
- Backpacker’s Pantry – More adventurous options (hello Pad Thai)
🥜 Trail Snacks:
- Protein bars
- Jerky
- Mixed nuts or trail mix
- Tuna, salmon, or chicken packets (flavoured or plain)
📌 Pro Tip: Bring a few extra snacks for the hike out—you’ll burn more calories than you think.
Food Storage
Although there are no bears in Havasupai, mice, squirrels, and other critters are common—and they will chew through your pack or your tent if you leave food inside. A good system for hanging your food where the critters can’t get at it is essential.
Top Pick
- Rat Sack 👉 Buy at: Amazon USA | Amazon Canada
Budget Alternative
- Bear Bag Hanging System 👉 Buy at: Amazon USA | Amazon Canada
Water System
Staying hydrated in the desert is non-negotiable. Between the intense sun and long hiking distances, you’ll need a solid system for carrying, filtering, and replenishing water throughout your trip.
Water planning at Havasupai is shaped by heat, distance, and the location of reliable water sources.
Hydration Bladder or Water Bottle
There are no water sources between the trailhead and Supai Village. All water for this stretch must be carried from the start. The hike is long, exposed, and often hot, so carrying enough water for the entire distance is essential.
Most hikers plan to carry 3–4 litres on the hike in and out, adjusting for temperature, pace, and personal hydration needs.
Top Picks
- Platypus Big Zip Hydration Bladder
- Collapsible Water Flask 👉 Buy at: Amazon USA | Amazon Canada | REI
- Liquid I.V. 👉 Buy at: Amazon USA | Amazon Canada
- Hydration Bladder Cleaning Kit 👉 Buy at: Amazon USA | Amazon Canada
Budget Alternative
- Nevo Rhino Hydration Bladder 👉 Buy at: Amazon USA | Amazon Canada
- Bonus- This bladder is included with the Nevo Rhino day pack
📌 Pro Tip: For the hike in and out, we carried a 3-litre hydration bladder for steady sipping, plus a separate collapsible flask mixed with electrolytes to help manage heat on the long, exposed trail.
Water Filtration & Purification
While spring water is available at the campground and village, you’ll need a filter for any water collected beyond that—especially if hiking to Beaver Falls or the Confluence. Furthermore the Havasupai tribe officially recommends filtering spring water just to be safe.
For Group Use:
- Platypus 4 L Gravity Filter 👉 Buy at: Amazon USA | Amazon Canada | REI
- Optional Carbon Filter Attachment 👉 Buy at: Amazon USA | Amazon Canada
- Replacement Filter 👉 Buy at: Amazon USA | Amazon Canada | REI
For Individual Use:
- Katadyn BeFree 1 L Filter (with carbon filter)
- 👉 Buy at: Amazon USA | Amazon Canada | REI
- Back up Water Purification Tablets 👉 Buy at: Amazon USA | Amazon Canada
Navigation & Safety Essentials
Havasupai is remote and rugged with very limited cell service —it’s part of what makes it so special. But that also means you need to be prepared in case plans change, weather shifts, or someone in your group needs help. These safety items and extras offer peace of mind and convenience on the trail and in camp.
Navigation Tools
- Offline GPS maps (Gaia, AllTrails, Maps.me) fully downloaded
- Download offline maps before you leave—there’s no guarantee of signal.
- Portable Power bank + charging cable
- Inui Power Bank 👉 Buy at: Amazon USA | Amazon Canada
- Lightning Cable 👉 Buy at: Amazon USA | Amazon Canada
- USB C Cable 👉 Buy at: Amazon USA | Amazon Canada
- Headlamp (for foggy or late night/early morning conditions)
- 2 Pack Rechargeable Headlamps 👉 Buy at: Amazon USA | Amazon Canada
- Whistle (built in to many packs)
Satellite Communicator
Cell service is extremely limited once you enter the canyon. A satellite device allows you to text family, communicate with your group, and reach emergency services if needed.
Top Picks
- Garmin in Reach Mini 👉 Buy at: Amazon USA | Amazon Canada | REI
- Zoleo 👉 Buy at: Amazon USA | Amazon Canada | REI
First aid kit
- Moleskin 👉 Buy at: Amazon USA | Amazon Canada
- Bandaids 👉 Buy at: Amazon USA | Amazon Canada
- Tylenol/Advil 👉 Buy at: Amazon USA | Amazon Canada
- If you bring both, you can double up and take both at the same time
- Gauze 👉Buy at: Amazon USA | Amazon Canada
- Tape 👉 Buy at: Amazon USA | Amazon Canada
- KT Tape 👉 Buy at: Amazon USA | Amazon Canada
- Medications
- Tweezers
Multitool or knife
Top Pick
- Leatherman, Wave, 18-in-1 Multi-Tool
- 👉 Buy at: Amazon USA | Amazon Canada | REI
Budget Alternative
- Rocktol Multitool, 22-in-1 👉 Buy at: Amazon USA | Amazon Canada
Clothing
In the canyon you’ll need lightweight and quick drying clothes that you can layer. Expect the evenings to be much cooler than the daytime. Keep your clothes to a minimum while making sure to be prepared for the variety in temperature.
Brands we love:
- Outdoor Research
- Columbia
- REI
For All Seasons
- ✅ Moisture-wicking hiking shirt (short or long sleeve)
- ✅ Lightweight hiking pants or shorts (quick-dry)
- ✅ Sun hoodie or long-sleeve SPF shirt
- ✅ Sports bra / underwear / base layers (quick-dry)
- ✅ Swimwear (for the falls!)
- ✅ Wool or synthetic hiking socks (2–3 pairs)
- ✅ Camp shoes or sandals (Teva, Chaco, or Crocs)
- ✅ Hat (wide-brimmed or baseball cap)
- ✅ Buff or neck gaiter (for dust or sun)
- ✅ Rain jacket or poncho (always—monsoons happen)
- ✅ Grippy gloves for descending Mooney Falls
Add for Summer (June–August)
- ✅ Extra moisture-wicking top (you’ll sweat a lot)
- ✅ Cooling towel- essential for staying cool
- 👉 Buy at: Amazon USA | Amazon Canada
- ✅Sun sleeves or long sleeved sun shirt = the desert sun is no joke
- ✅ Light sleepwear (shorts + tee or tank)
- ✅ Optional: Bug protection (in some buggy seasons)
Expect hot days (90–110°F / 32–43°C) and warm nights (65–75°F / 18–24°C). Hydration and sun protection are your top priorities.
Add for Spring/Fall (March–May / September–October)
- ✅ Light puffy jacket or fleece
- ✅ Thermal long sleeve or base layer
- ✅ Light gloves (optional for chilly mornings)
Temps can drop to 40–50°F (4–10°C) at night, especially in early spring or late fall. Layers are key for comfort at camp.
Footwear
Footwear needs at Havasupai vary depending on where you’re hiking.
Hiking Shoes
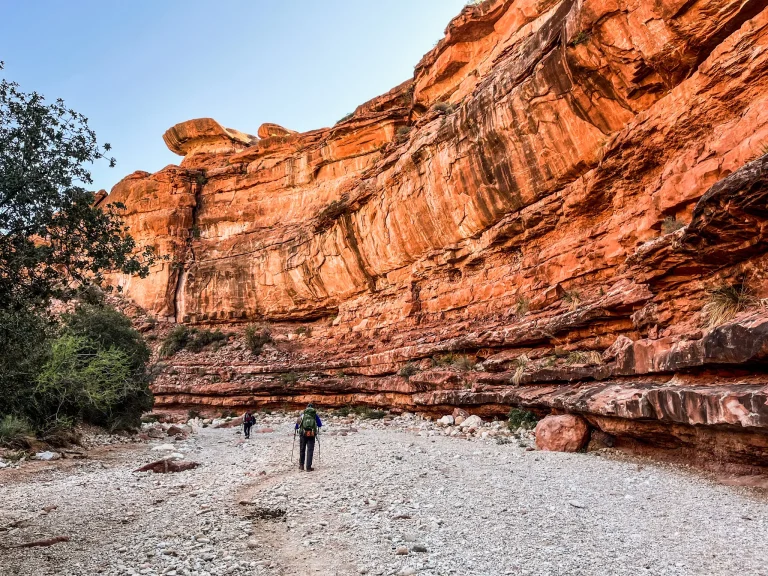
The main trail in and out of Havasupai is dry and non-technical, with no river crossings. Expect a long, steady hike on well-established desert trail with sandy and rocky sections, often in hot conditions. Breathability and all-day comfort matter more here than aggressive tread or waterproofing.
Trail runners are a common choice, and some hikers are also comfortable in closed-toe sandals paired with toe socks. Choose footwear you already trust for long mileage on straightforward terrain.
River Shoes & Sandals (Essential for Side Trips)
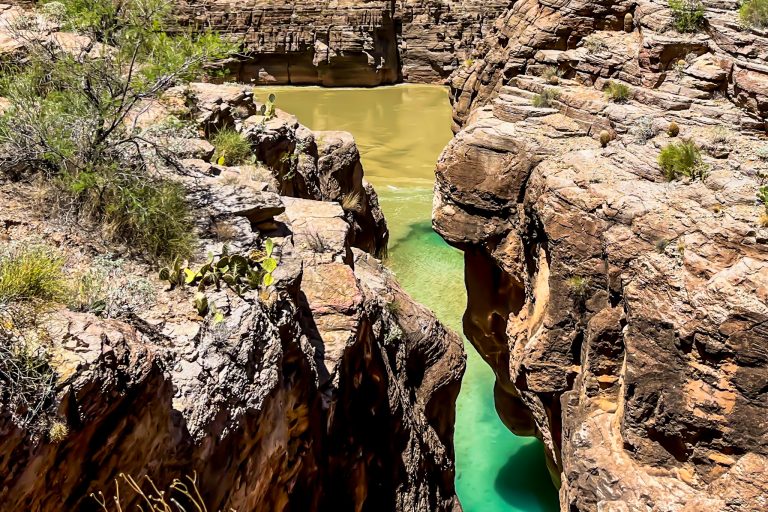
Side hikes to Beaver Falls, the Confluence, and time spent in and around the waterfalls are more technical than the main trail. These routes involve repeated creek crossings, slick rock, uneven footing, and short sections where careful foot placement is needed.
River shoes or sandals designed for wet terrain are essential for these outings. Pairing them with Cool Max toe socks can help reduce friction and prevent blisters, especially when your feet are wet for extended periods. Footwear that grips well on slick surfaces and can be fully submerged makes these hikes safer and more comfortable.
Camp Shoes
Camp shoes are strongly recommended. They’re useful around camp, for swimming, and for giving your feet a break after long hiking days.
Trail Runners
- Women’s Hoka Speedgoats 👉 Buy at: Amazon USA | Amazon Canada | REI
- Men’s Hoka Speedgoats 👉 Buy at: Amazon USA | Amazon Canada | REI
River Shoes
- Women’s Teva Omnium 👉 Buy at: Amazon USA | Amazon Canada
- Men’s Teva Omnium 2 / Keen Hyperport H2
- 👉 Buy at: Amazon USA | Amazon Canada | REI
Toe Socks
- Cool Max Toe Socks 👉Buy at: Amazon USA | Amazon Canada
Toiletries, Hygiene & Misc.
While the bathrooms at Havasupai campground are well maintained and usually stocked with toilet paper and soap, there are no facilities beyond camp—especially if you’re hiking to Beaver Falls or the Confluence.
Practicing Leave No Trace is critical: pack out used toilet paper and bury human waste at least 6–8 inches deep and 200 feet away from any water source or trail.
- Quick dry towel 👉 Buy at: Amazon USA | Amazon Canada | REI
- Cooling Towel 👉 Buy at: Amazon USA | Amazon Canada
- Biodegradable multi use soap 👉 Buy at: Amazon USA | Amazon Canada
- Toothbrush/paste
Sun Safety
- Sunscreen 👉 Buy at: Amazon USA | Amazon Canada
- Lip balm with SPF 👉 Buy at: Amazon USA | Amazon Canada
- Sunglasses with UV protection
- Hat preferably wide brimmed
Waterproof Phone Case
The waterfalls are irresistible—and so are the photo ops. Protect your phone from splashes, sand, and sudden swims.
Buy at: Amazon USA | Amazon Canada | REI
Carabiners
Great for hanging things up or hooking them to your backpack for easy access while hiking
Cash or card
For Supai Village Store/Cafe/ Fry Bread Stand/Lodge- if open
Optional / Nice-to-Have
Once your must-haves are packed, take a look at your remaining space and pack weight. If you’ve got room, these small luxuries can seriously level up your Havasupai experience:
- Ultralight backpacking chair
- Top Pick: REI Flexlite Air or Helinox Chair Zero.
- 👉 Buy at:Amazon USA | Amazon Canada | REI
- Budget Alternative: Naturehike or Trekology ultralight camp chairs
- Buy at: Amazon USA | Amazon Canada
- Top Pick: REI Flexlite Air or Helinox Chair Zero.
- Walkie Talkies (and extra batteries)
- Midland 2 Way Radios 👉 Buy at: REI
- Rechargeable AAA Batteries 👉 Buy at: Amazon USA | Amazon Canada
- Protect your phone from heavy rain or accidental exposure during a river crossing
- Phone Tripod/Selfie Stick 👉 Buy at: Amazon USA | Amazon Canada
- Peak Design Capture Clip 👉 Buy at: Amazon USA | Amazon Canada
- Keep your GoPro or DSLR camera on your backpack strap for easy access.
- GoPro Hero 13 👉 Buy at: Amazon USA | Amazon Canada
- Hiker Hunger Trekking Poles 👉 Buy at: Amazon USA | Amazon Canada
Things to Leave at Home
When you’re carrying everything on your back, every ounce counts. Here are a few things we either regretted bringing or were glad we left behind:
- Extra Toiletries – You won’t need a full skincare routine in the canyon. Stick to the basics, and pack them in small containers.
- Heavy Gear – Car camping tents, bulky sleeping bags, and oversized stoves = instant regret.
- Camera Accessories – A camera or GoPro is great, but tripods, lenses, and extras add up fast.
- Too Much Food – You’ll need calories, but plan your meals. A few extras snacks for the hike out and skip the rest.
- Bluetooth Speaker – Amplified music is not allowed. It’s in the terms the leader signs before you hike in. Havasupai is peaceful. Please keep it that way for others (and wildlife).
- Firewood – Campfires aren’t allowed in the canyon—leave it behind.
- Alcohol & Recreational Drugs – Not permitted in the canyon and could get you fined or banned.
- Too Many Clothes/Shoes – Rewear and repeat. Prioritize lightweight, quick-dry layers. If needed you can wash clothes with a little soap and water from the creek.
Pack smart, stay light, and thank yourself later.
Helpful Packing Tips
How you pack your bag is just as important as what you pack in it. These tips will keep your bag light, comfortable, and organized- so you can focus on the adventure, not the struggle. A little bit of preplanning can make a big difference on the trail.
Pack Light
We can’t emphasize this enough—every extra pound makes a difference on the hike in and out of Havasupai. Aim for a base weight (everything except consumables- that’s your food, water, and fuel) under 20 lbs. Once you add consumables, your total pack weight should stay under 20% of your body weight. The lighter your pack, the happier your knees, feet, hips, and back will be by the time you reach camp.
Stuff Sacks
Keep your backpack organized with stuff sacks, packing cubes, or even Ziplock bags. Trust me—you’ll be grateful when you’re digging for backup matches or hunting down your lip balm in the dark. Group your gear by category: toiletries, clothes, kitchen items, tech, and random extras should each have their own designated bag. It makes unpacking at camp faster, keeps everything dry, and helps you stay sane on the trail.
Test Your Gear First
Test everything before you hit the trail—even if it’s brand new. There’s nothing worse than realizing your air mattress has a leak or your tent is missing a pole once you’re already deep in the canyon. Make sure your gear works and that you know how to use it. Break in new shoes well ahead of time, double-check that your headlamp has fresh batteries, and do a full test setup of your tent and sleep system. A little prep now saves a lot of stress later.
Pack for Heat—but Be Ready for Cold Nights
Daytime temps can be brutal, especially on exposed trail sections. But evenings in the canyon can get chilly, especially in spring and fall. Bring layers: a light long sleeve for sun protection, and a warm base layer or puffy jacket for camp.
Unbox Before You Pack
Ditch the bulky packaging. You can shave off ounces (and save space) by repacking snacks, meals, and toiletries into Ziplocks or reusable bags. That box of protein bars? Leave the box behind and just take the bars. It’s lighter, easier to organize, and frees up space as you eat through your stash. Every little bit adds up on the trail!
Heavy Items on the Bottom
Pack your heaviest gear-like your tent, sleeping bag, or stove- at the bottom of your backpack. This keeps the weight centred over your hips, not pulling on your shoulders. Aim to balance the load evenly side to side, so your bag doesn’t feel lopsided or throw off your stride. An uneven bag can lead to pinching, bruising, or just general discomfort.
Hang Your Backpacks
Hang your backpacks when not in use — it’ll keep rodents out, and your gear will have a better chance of staying safe if a flash flood sweeps through camp. Being secure off the ground, reduces the risk of it being carried downstream.
Havasupai Packing List: Wrap Up
Hiking into Havasupai is more than just a backpacking trip—it’s an unforgettable adventure through one of the most stunning places in the Southwest. It was at the top of my bucket list, and it absolutely delivered. But even with all our preplanning the journey was intense.
From blisters, to flat sleeping pads, to ill fitting backpacks our group paid the price for every mistake. Although nothing can take away from the magic of this place, packing the right gear, understanding the terrain, and planning for the conditions can minimize the slog in and out of the canyon and keep you comfortable, safe, and fully present to enjoy every step of the journey.
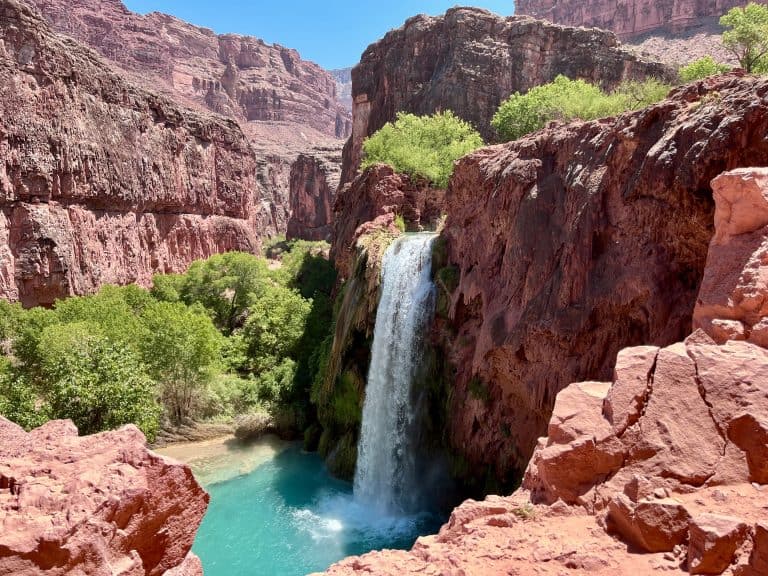
Whether you’re a first-time backpacker or a seasoned hiker, Havasupai comes with unique challenges: long miles in desert heat, limited facilities, and remote trail conditions. But it also rewards you with turquoise waterfalls, quiet canyon nights, and the kind of memories that stay with you for a lifetime.
Use this guide to pack smart, hike safe, and travel light. You’ll come back with sore legs, core memories, and a deep appreciation for the beauty that we are blessed beyond measure to experience.