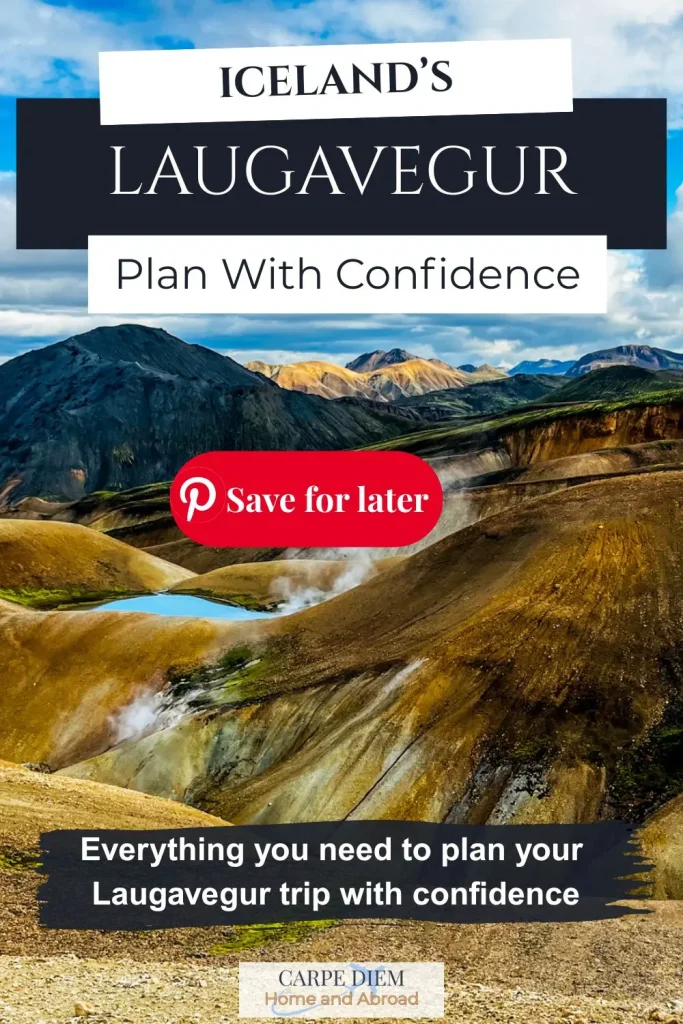
Iceland’s Legendary Laugavegur Trail
If you’re searching for a hike that’s wild, raw, and otherworldly, Laugavegur will leave you in awe with every changing landscape. Some trails are beautiful, but the Laugavegur Trail is unlike anything we’d ever hiked before.
This was our longest backpacking trek to date. We landed in Iceland fully intending to hike it, but once we were on the ground—so many waterfalls, canyons, and remote corners still calling to us—we hesitated.
Hiking Laugavegur meant cutting our time in the East Fjords and completely skipping the West Fjords. We had already stood among the colourful rhyolite mountains of Landmannalaugar, and I honestly wondered if the rest of the trail could live up to the hype.
I didn’t know what made the Laugavegur special beyond the rhyolites, and I wondered if we’d regret what we’d have to sacrifice to make it happen.

Spoiler alert: We didn’t regret it for a second. It delivered in every way imaginable, becoming our favourite trail in Iceland—maybe our favourite trail we’ve ever done. From steaming geothermal valleys to black ash deserts and glacier-carved canyons, the Laugavegur Trail delivered more unforgettable moments than we could have imagined.

Laugavegur Planning at a Glance
This planning overview is designed to help you organize the most important parts of your trip without overcomplicating things
Want everything organized in one place? Explore the Complete Laugavegur Planner.
Where to Stay the Night Before:
Important Trail Logistics:
Book Ahead:
- Rental Car/Shuttle- Discovercars
- Travel Insurance- Safety Wing
- eSIM- Saily
Some links on this page are affiliate links, which may earn us a small commission at no extra cost to you. We only recommend what we genuinely use or trust. Thank you for supporting our blog.
Laugavegur Trail TL;DR
- Trail Length & Duration: 55 km (Landmannalaugar → Þórsmörk), typically 4–5 days; add Fimmvörðuháls to Skógafoss for 1–2 extra days.
- Weather: Extremely variable—sun, rain, fog, and wind can all happen in one day. Check hut forecasts and safetravel.is.
- River Crossings: Some unbridged; expect water depth from ankle to mid thigh bro higher depending on current conditions. Timing and footwear are critical.
- Huts vs Camping: Camping is cheapest with most flexibility if you own gear; huts cost more but offer shelter and lighter packs. Guided tours provide maximum support and comfort.
- Gear Essentials: Waterproof layers, sturdy boots, trekking poles, sleeping bag (0–5°C), and a thermos for hot meals.
- Transportation: Buses connect Reykjavík → Landmannalaugar → Þórsmörk/Skógar; other towns like Hella, Selfoss, and Skógar are also accessible—check schedules. Cannot drive to Porsmork.
- Safety: Register your plan, carry a charged phone or satellite communicator, and respect river/riverbank conditions.
Bottom line: Laugavegur is an epic, diverse, and unforgettable trek. Plan carefully, hike safely, and soak in every Icelandic landscape along the way.
If you’d like to explore each planning element in more depth — from budgeting and transportation to packing strategy and route extensions — the full Laugavegur planning hub brings everything together in one place.
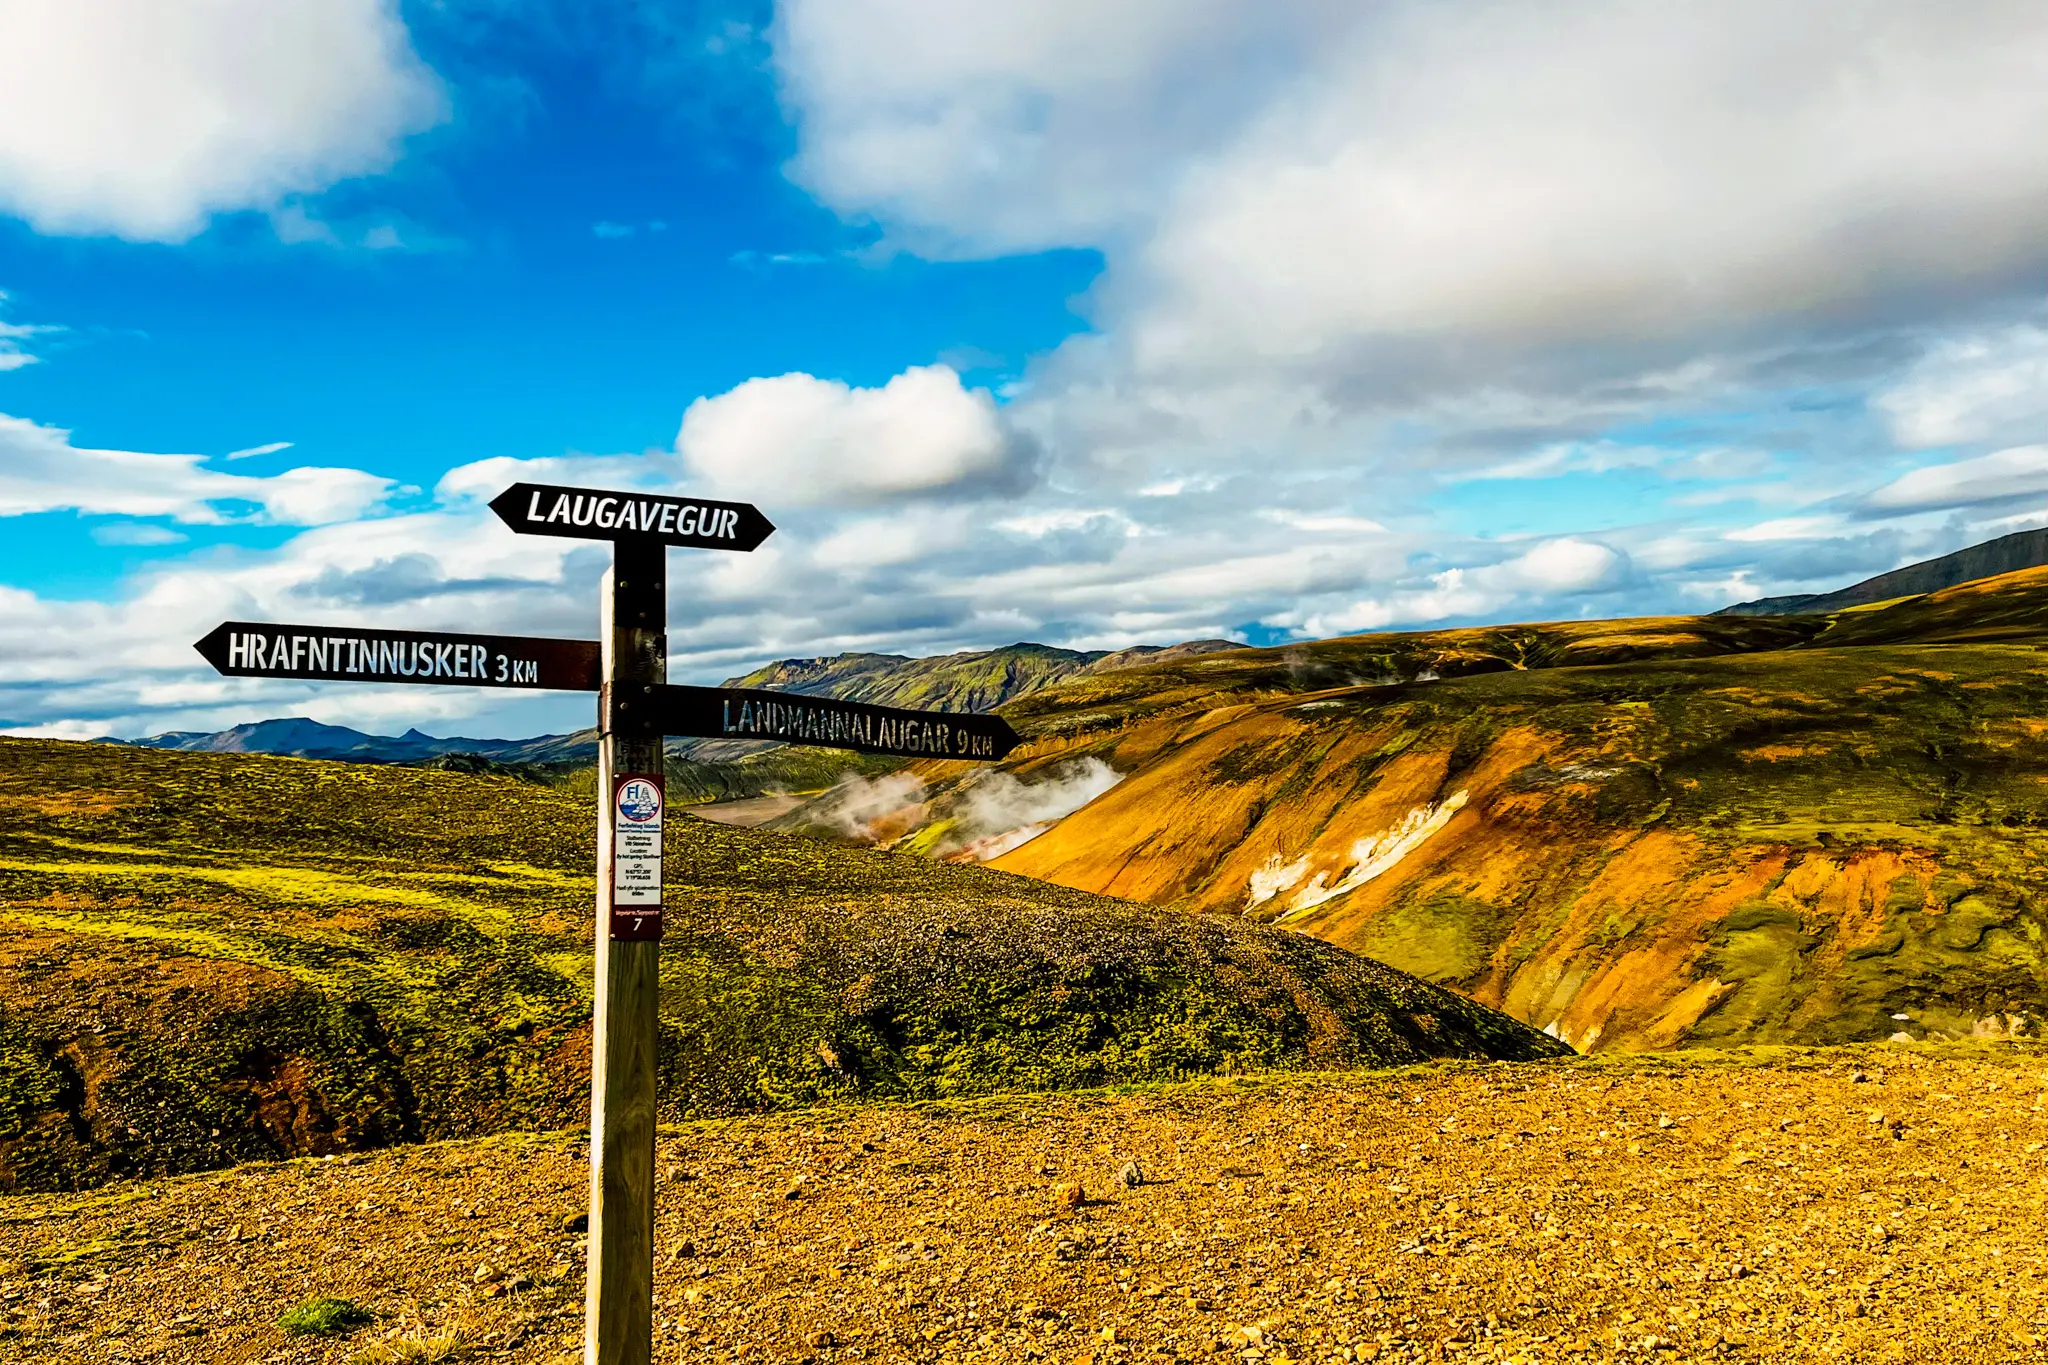
Quick Overview of the Trail
Laugavegur Trail
Distance: 55 kms (34 miles)
Point to Point: Landmannalaugar to Porsmork
Elevation Gain: 1838 m
Average Duration: 3-4 days
Difficulty Level: Moderate to challenging
—river crossings, weather exposure, and long hiking days
AllTrails Map
Optional Add on:
Fimmvörðuháls 25 kms/ 15.5 miles to Skógar
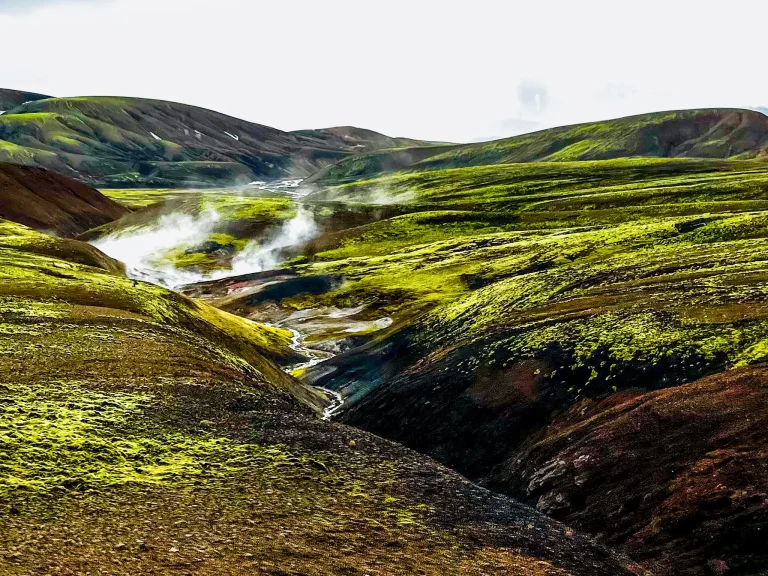
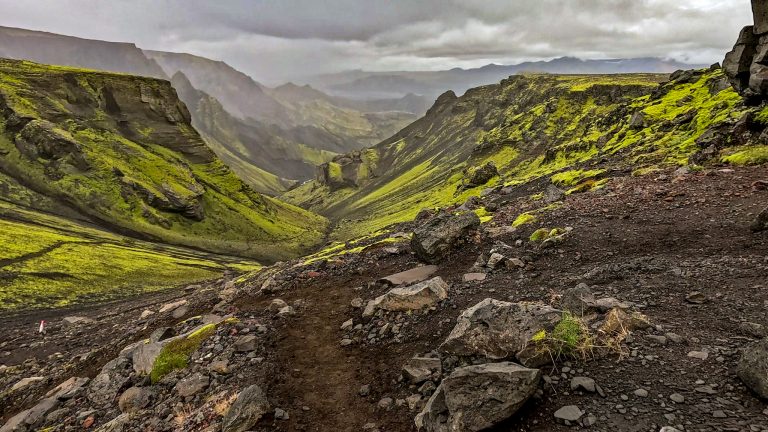
The Laugavegur Trail is Iceland’s most famous multi-day trek, stretching through some of the country’s most dramatic landscapes. In just a few days, you’ll walk from steaming geothermal fields in Landmannalaugar to mossy valleys and birch forests in Þórsmörk. The scenery changes constantly—rhyolite mountains, black sand deserts, obsidian lava fields, glaciers, and vibrant green canyons. It’s wild, remote, and feels like trekking across different worlds in one trail.

Trail Itinerary
Most people do this trek over 4 days. However it is easy to make it longer or shorter. We opted for a three day itinerary, combining the first two sections for a long first day.
| Day | From → To | Distance | Highlights |
|---|---|---|---|
| 1 | Landmannalaugar → Hrafntinnusker | 12 km ~800 m elevation | Hot springs, rhyolite mountains |
| 2 | Hrafntinnusker → Álftavatn | 12 km ~250 m elevation | Snowfields, lava, lakes, steep downhill sections, short rope assisted river crossing |
| 3 | Álftavatn → Emstrur | 15 km ~443 m elevation | Black sand desert, rivers, deepest and fastest moving river crossing |
| 4 | Emstrur → Þórsmörk | 15 km ~436 m elevation | Canyons, birch valley, wide but fairly shallow river crossing |

Best Time to Hike the Laugavegur Trail
The Laugavegur Trail is officially open from late June to early September. Outside this window, snow and river levels make the trek unsafe.
Month-by-Month Conditions (Quick Overview)
- July and early August: Peak season. Most huts open. Rivers are usually manageable. Weather is more stable.
- Late June: Snow may still cover high passes. Rivers are higher from meltwater. Fewer hikers.
- Early September: Fewer crowds and stunning autumn colours. Huts start closing. River crossings may rise after early snow. Plus, this is your first chance to see the northern lights along the trail.
When We Hiked the Laugavegur
We had originally planned to hike during the last week of August, but a serious weather system hit on our start date. The hut wardens warned that torrential rain was making the rivers nearly impossible to cross. We decided to postpone.
We ended up starting the trek at the end of our trip, on September 1st. Fortunately, the weather turned out to be excellent, and we got to see the northern lights out on full display. The first three days brought medium-strength winds and light rain, but nothing too challenging. We didn’t encounter any serious weather until our Fimmvörðuháls extension on the last day.

Weather You Can Expect Any Time of Year
Icelandic highland weather is unpredictable. Expect rain, wind, sun, fog, or snow—sometimes all in one day. Always check the daily forecast and river conditions. Dress in layers and carry waterproof gear.
Other Seasonal Considerations
- Crowds: Mid-July is busiest. Huts fill fast. Early booking is essential.
- Daylight: Summer offers long days (up to 20+ hours in June). Early September still has enough light for safe hiking.
- River crossings: Water levels peak during snowmelt and after heavy rainfall. Plan crossings accordingly.
📌 Pro Tip: If you want solitude, aim for late June or early September. Early September offers fewer hikers, beautiful autumn colours, and a chance to see the northern lights, but nights are colder and days shorter.
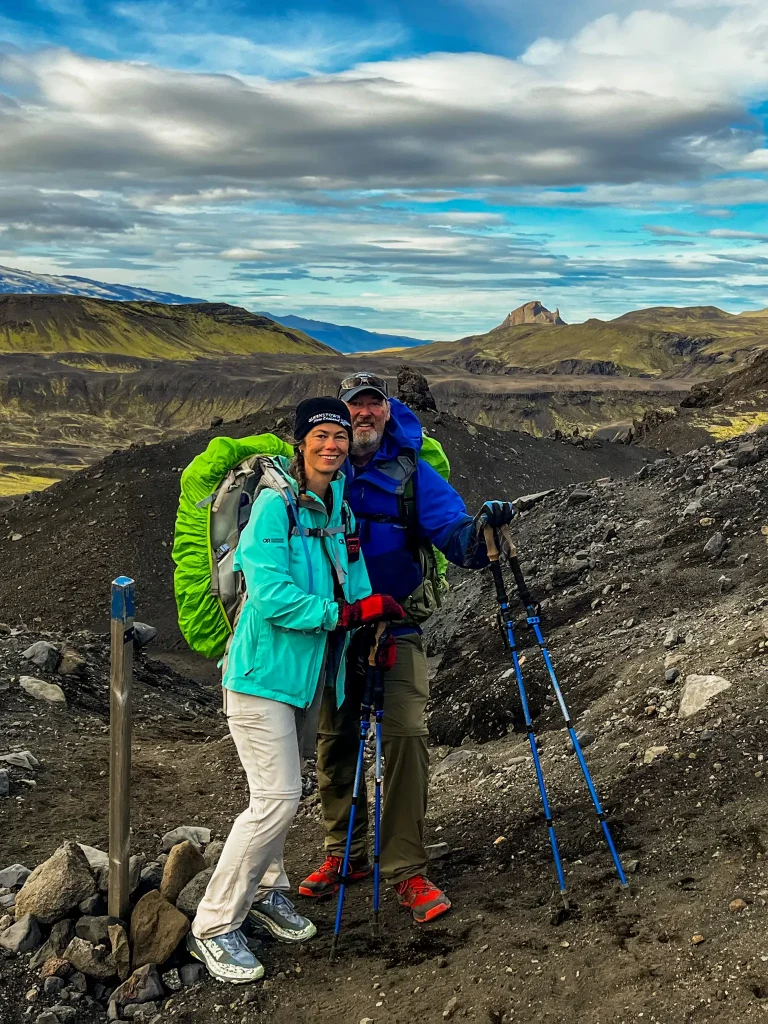
What to Pack for the Laugavegur Trail
Packing for the Laugavegur—and for Fimmvörðuháls, if you choose to continue—depends on whether you’re camping or staying in mountain huts. Regardless of where the trail ends, you’ll need to be prepared for rapidly changing weather, cold nights, and long days on rugged terrain. Proper layers are critical. Layering your clothes effectively isn’t optional here — it’s essential for staying warm, dry, and safe.
I’ve created a complete, detailed packing list that is part of the free Laugavegur toolkit. It includes exact gear recommendations, what to look for when buying gear, and optional items based on how you’re hiking.
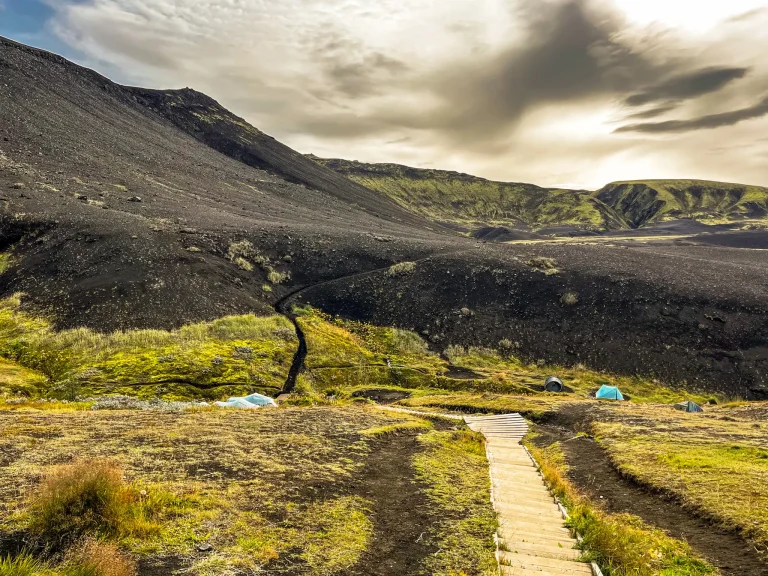
Huts & Camping Overview
You can hike Laugavegur two ways: staying in the mountain huts or camping beside them. Both options follow the same route and stop at the same locations each night. The main difference is comfort, cost, and how much you want to carry.
For a full breakdown of huts, campgrounds, amenities, and booking considerations, see the complete guide to camping on the Laugavegur.

Mountain Huts
The huts are run by FI (Ferðafélag Íslands – the Icelandic Touring Association). They’re basic but warm and dry. Think hostel with very limited capacity.
Camping (Our Choice)
Each hut has a designated camping area right beside it. You can’t wild camp along the trail—camping is only allowed at official hut sites.
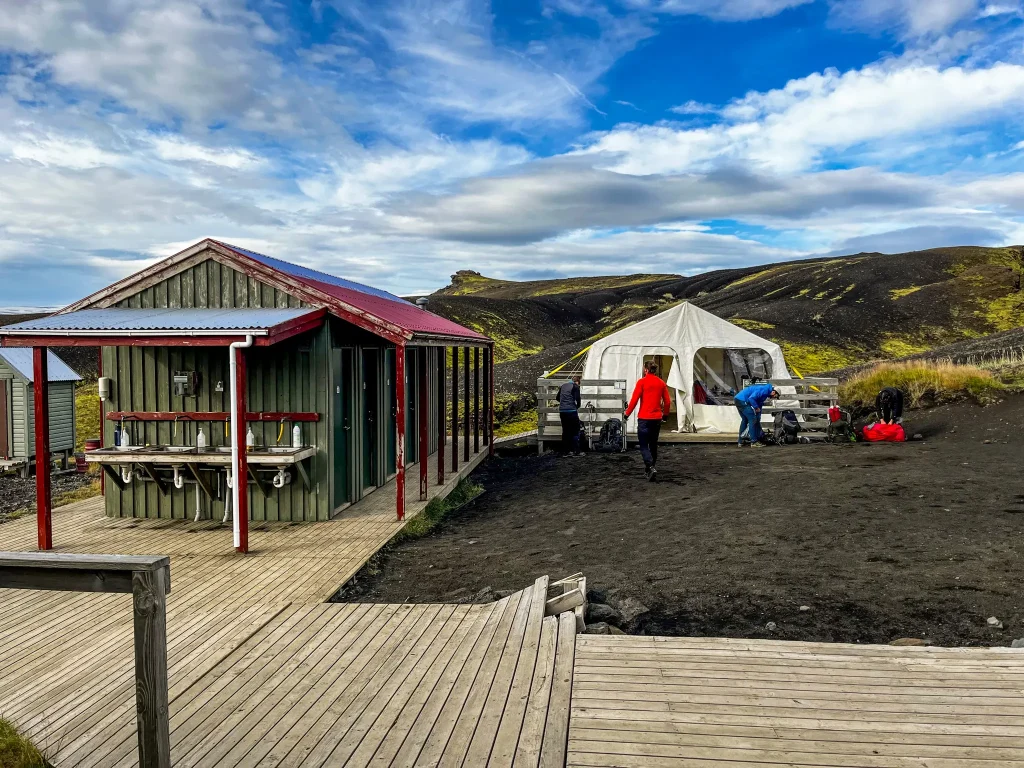
We chose to camp because it gave us more flexibility and lower costs. Reservations are now required for campgrounds also, but the cancellation policy is much more flexible than for huts.
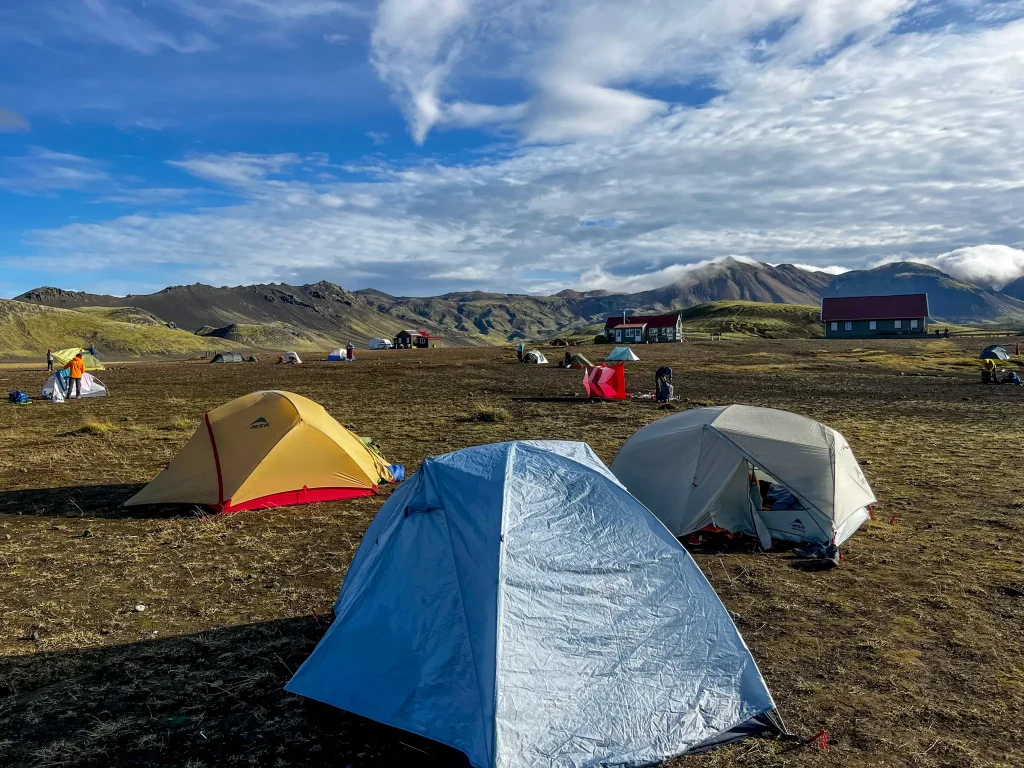
Camping: What You Need to Know
Camping on the Laugavegur isn’t technically difficult, but highland conditions mean small mistakes can become big problems. These are the essentials every camper should understand before committing.
- Tent setup essentials in high winds:
- Stake all guylines and guy your tent fully
- Orient the tent so your lowest wall faces into the prevailing wind
- Reinforce stakes with trekking poles or rocks if ground is loose
- Always carry basic repair supplies– highland winds and terrain can damage gear faster than you expect:
- Tent peg splints for bent or broken stakes
👉 Buy at: Amazon USA | Amazon Canada - Fabric repair tape for small tears in tents, packs, or clothing
👉 Buy at: Amazon USA | Amazon Canada - Sleeping pad patch kit for air pad leaks
- 👉 Buy at: Amazon USA | Amazon Canada
- Tent peg splints for bent or broken stakes
These aren’t “nice to have” items — they’re problem-solvers when weather or terrain damages gear mid-trail.

Transportation: Getting To & From the Laugavegur Trail
Getting to and from the Laugavegur Trail requires planning. Roads are rough, there isn’t a direct line of public transport between trailheads, and the trail is point-to-point—not a loop. Most hikers will need a shuttle in at least one direction.
Driving to Landmannalaugar
- 4×4 required: The F-roads into Landmannalaugar are rough but manageable in a proper 4×4. Driving on F-roads with a non 4×4 vehicle is illegal in Iceland.
- Prebook parking: If you don’t want to drive through the river into the campground, you can reserve a parking spot before the water crossing. Cost is 1,200 ISK (USD 9.42 or CAD 13.29).
- Bus arrival times: Buses from Reykjavik and Hella usually arrive around 11:00 am, so if you’re bussing in, be prepared for a late start on Day 1 unless you stay overnight in Landmannalaugar.
Driving to Þórsmörk
- A regular 4×4 isn’t enough—deep river crossings make this route suitable only for super jeeps or modified vehicles.
- Most hikers take the highland bus from Reykjavik or Hella. Hella was our home base and works great if you already have a car and want a shorter bus ride.
Our Transportation Plan
We made things a bit complicated—but it saved money and worked perfectly for us.
- We drove to Landmannalaugar and left our car there.
- After finishing the trail in Þórsmörk, Jaimie caught the last bus out that afternoon, stayed the night in Hella, and then took a bus back to Landmannalaugar the next morning to pick up the vehicle.
- Meanwhile, Joshua and I hiked the Fimmvörðuháls extension from Þórsmörk to Skógar, where Jaimie picked us up just in time for supper.
- Craig and Sarah stayed back, enjoyed a slower morning in Þórsmörk, and took an afternoon bus to Hella.
Three exits, three different ways out—but it allowed us to reunite in Hella and minimized our need for highland bus tickets.
If you want a full breakdown of transportation options, including round-trip buses, self-drive scenarios, and how to reduce costs, I’ve laid it all out in a dedicated guide to transportation to the Laugavegur.
Key Things to Know Before You Pack
1. Weatherproofing is non-negotiable
Even in mid-summer, expect rain, strong winds, and near-freezing temperatures—especially between Landmannalaugar and Hrafntinnusker. Waterproof layers and warm mid-layers are essential whether you camp or stay in huts.
2. Camping requires a full sleep system
If you plan to camp (as we did), you’ll need to carry a tent, sleeping bag, sleeping pad, and stove. The huts do not allow access to their kitchens or shared gear if you are camping.
3. Hut hikers still need almost all the same gear
Staying in huts reduces your load, but it doesn’t remove the need for:
- A warm sleeping bag (mattresses are provided but no bedding)
- Full rain gear & warm layers
- Food for the entire trip
- Emergency and navigation tools
4. Trekking poles are extremely useful
They make river crossings safer, take pressure off your knees, assist with steep ascents and descents, and help with balance in muddy or rocky sections.
5. Safety and navigation gear matter
Even on a marked trail, storms roll in fast. A satellite communicator, offline GPS, headlamp, and emergency kit should all be considered essentials.
📌 Pro Tip: Camp-Only Clothes
Pack one dry set of clothes in a waterproof bag and never hike in them. These are for camp only. After a wet or windy day, having something completely dry to change into makes a huge difference.
How We Packed
We carried full backpacking setups since we camped every night. Our food strategy was simple:
- Hot thermos lunches prepped each morning (our favourite trail hack!)
- Dehydrated dinners—a mix of homemade and store-bought
- Lightweight, high-protein snacks like tuna packets, and bars
Packing for Laugavegur is all about balancing weight, warmth, and weather protection. Even in summer, Iceland can throw wind, sleet, sideways rain, or surprise sunshine at you—all in one day. You need to be ready for it all.
The free Laugavegur toolkit includes a full packing list packed with tips to help you learn from our experiences and avoid our mistakes.
Meal Strategy Overview
We packed a mix of snacks, protein bars, homemade dehydrated meals, store-bought backpacking meals, and used a food thermos every day for lunch. This made eating on the trail easy—no need to unpack stoves or cook mid-day, even in wind, rain, or on exposed plateaus. Check out our full guide to Hiking Fuel for High Elevation climbs.
Why We Love Thermos Meals
Using a food thermos for lunches has become a game changer for us when hiking, and the Laugavegur Trail was no exception. I insisted everybody buy one before we left home, and they were pure gold on the trail! Here’s why:
- A hot, well-balanced meal on the trail
Even in wind, rain, or cold mountain passes, we always had a warm meal waiting—boosting morale and keeping us energized. - Perfect mix of carbs and protein
Our thermos meals were designed to refuel tired legs and support recovery—dishes like chili, curry, pasta, and rice with added protein. - Just five minutes of prep in the morning
Add boiling water, stir, seal the thermos—and lunch is ready to eat by midday. No stove, no setup, no waiting on the trail. - Zero trash midday
Everything was packed in the thermos, so we didn’t have packets or wrappers to haul out after lunch.
🔥 We Use This: Food Thermos
Before you hit the trail, prep a hot lunch and pack it in a high-quality food thermos. After hours of hiking, there’s nothing better than opening your pack to find a warm, ready-to-eat meal waiting for you at the Confluence.
They are lightweight, durable, and keep your food warm for hours.
👉🏾 Buy at: Amazon USA | Amazon Canada | REI
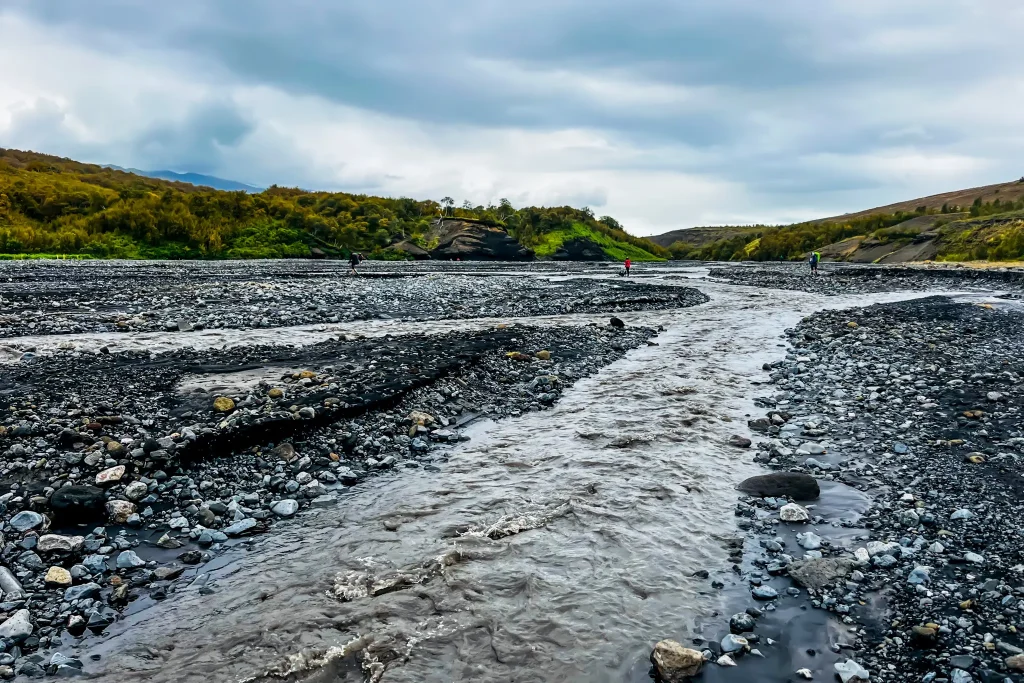
River Crossings
One of the most memorable—and intimidating—parts of the Laugavegur Trail is crossing its glacial rivers. Although some rivers crossings are bridged, there are a few notable, unbridged river crossings. Proper preparation and planning is essential. The rivers are cold, fast-moving, but with the right timing, technique, and gear, these crossings are manageable and even part of the adventure.
Major Unbridged Rivers You’ll Encounter
Although small streams are frequent on the trail, only a few crossings are wide, fast-flowing, or above knee-deep. These can change daily depending on weather and meltwater levels.
When we did the hike all the river crossings were between calf and knee deep, and easily manageable, but they can be thigh to waist deep and fast moving after a recent rainfall or snow melt. The most notable rivers are:
- Rope-Assisted River (near Álftavatn)
Just before reaching the Álftavatn hut/campground, a small glacial stream has a fixed rope for stability. Water can be knee- to thigh-deep. The rope helps balance but does not eliminate risk—proper footwear like river shoes or neoprene socks is still essential. - Grashagakvísl and Innri Emstruá
Smaller but still swift-flowing rivers between Álftavatn and Emstrur; depth can vary with rainfall. - Bláfjallakvísl / Bratthálskvísl
South of Álftavatn, a cold, glacial river that can range from calf- to thigh-deep depending on meltwater. Some consider this the most difficult crossing. Timing matters—morning crossings are usually easier. - Þröngá River (near Emstrur / Þórsmörk)
The largest and sometimes most challenging crossing. Fast, cold, and up to thigh-deep in some conditions. Use trekking poles and move carefully. - Krossá River (between Þórsmörk and the start of Fimmvörðuháls)
This river often has a footbridge, but it can be removed when water levels rise or the flow is too fast. Crossing on foot can be dangerous and swift, especially in the afternoon.
If the bridge is out, waiting until morning—when glacial meltwater is usually lower—can make a big difference.
⚠️Timing is Critical:
When we arrived in Þórsmörk, several hikers tried to cross the river that afternoon on foot—one was nearly swept away by the fast current, and most were unsuccessful. The following morning, Joshua and I crossed safely with the maximum depth being knee-high.
How to Cross Safely (Technique + Footwear)
Footwear Options:
- Never cross barefoot. Rocks are sharp and slippery; numb feet lose balance easily. Feet can easily get cut by rocks.
- Neoprene socks + river shoes or sandals: Best combo for warmth and traction.
- Neoprene socks 👉 Buy at: Amazon USA | Amazon Canada
- Women’s Teva Omnium 👉 Buy at: Amazon USA | Amazon Canada
- Men’s Teva Omnium 2 / Keen Hyperport H2
- 👉 Buy at: Amazon USA | Amazon Canada | REI
- Lightweight sandals or camp shoes: Fine in summer but expect numb toes—glacial water is brutally cold.
Safety Tips:
- Assess before entering: Look for the widest and shallowest point—water looks calmer where it spreads out.
- If the water is above mid-thigh or pushes strongly against your legs—don’t risk it. Wait or walk upstream/downstream to find a safer spot.
- Use trekking poles or a sturdy stick for extra balance.
- Undo backpack straps before entering—if you fall, a waterlogged pack can pull you under.
- Cross in groups if possible: Stand side-by-side, arms linked or packs touching the next person’s hip for added stability. Wait for another group to arrive if necessary.
- If swept off your feet: Keep your feet pointed downstream, stay on your back, and try to steer towards the shore.
- Take your time—slow, steady, and deliberate is safer than rushing.
Weather, Safety & Trail Conditions
Icelandic mountain weather is unpredictable, fast-changing, and can be extreme—even in summer. Hikers must plan carefully, stay informed, and know their safety options.
Volatile Mountain Weather
Layering and waterproof gear are essential; always carry a wind and waterproof jacket and pants and a dry set of clothes.
Temperatures can swing from sunshine to sleet, snow, or freezing wind in a matter of hours. High wind and pouring rain are common, especially on exposed ridges like Hrafntinnusker. Trail conditions can shift quickly: rivers rise, volcanic ash turns muddy, and rocks become slippery. It’s one of the reasons many hikers underestimate how hard the Laugavegur Trail can feel once weather and exposure are factored in.
Trail conditions can shift quickly: rivers rise, volcanic ash turns muddy, and rocks become slippery.
To give you an idea of how unpredictable Laugavegur weather can be—on the final day of our hike we experienced almost everything Iceland could throw at us. We started in warm sunshine and hiking in t-shirts, then walked through light rain, followed by dense fog where visibility dropped to only a few metres with pounding rain and strong wind. By the time we reached the end of the trail, the sun was back out again.

It all happened in a single day, without ever leaving the trail. That’s why waterproof layers, dry backup clothing, and constant weather awareness aren’t optional—they’re essential. Without the right gear the trail can be not only gruelling, but potentially dangerous.
🥾 Free Laugavegur Packing Checklist
Make sure you have the right gear and quality layers to keep you warm and safe on the trail
Optional Extension: Fimmvörðuháls to Skógafoss

If you feel strong once you arrive in Þórsmörk, extending your trek to Skógafoss by combining the Fimmvörðuháls and Laugavegur is one of the most dramatic and rewarding ways to finish the hike. The route connects Iceland’s highlands to the South Coast, crossing fresh volcanic craters, exposed high passes, and eventually descending beside a seemingly endless series of waterfalls. It’s often called Iceland’s best day hike for good reason — and for those planning to hike the full Laugavegur–Fimmvörðuháls combo route, understanding the added elevation, exposure, and pacing considerations can make all the difference at this stage of the journey.

Highlights Along the Route
Magni & Móði Craters + 2010 Eruption Lava Fields
- Formed during the 2010 Eyjafjallajökull eruption.
- The twin craters, named after Thor’s sons Magni and Móði, are a short detour off the main path.

⚠️ Follow the All-Yellow Trail Markers!
Right after the sign about Móði & Magni, you’ll hit a fork. Stay left and follow the solid yellow markers only. If you accidentally follow the yellow markers with red tops (like we did), you’ll end up on the wrong route—one that requires three river crossings and a glacier crossing before you reconnect with the main trail!
Fimmvörðuháls Pass
- High mountain pass between two glaciers: Eyjafjallajökull and Mýrdalsjökull.
- Weather here can be extreme—snow, fog, and wind even in midsummer.
- There are two emergency huts: Baldvinsskáli Hut (high point) and Fimmvörðuskáli Hut, which some hikers choose to overnight in.

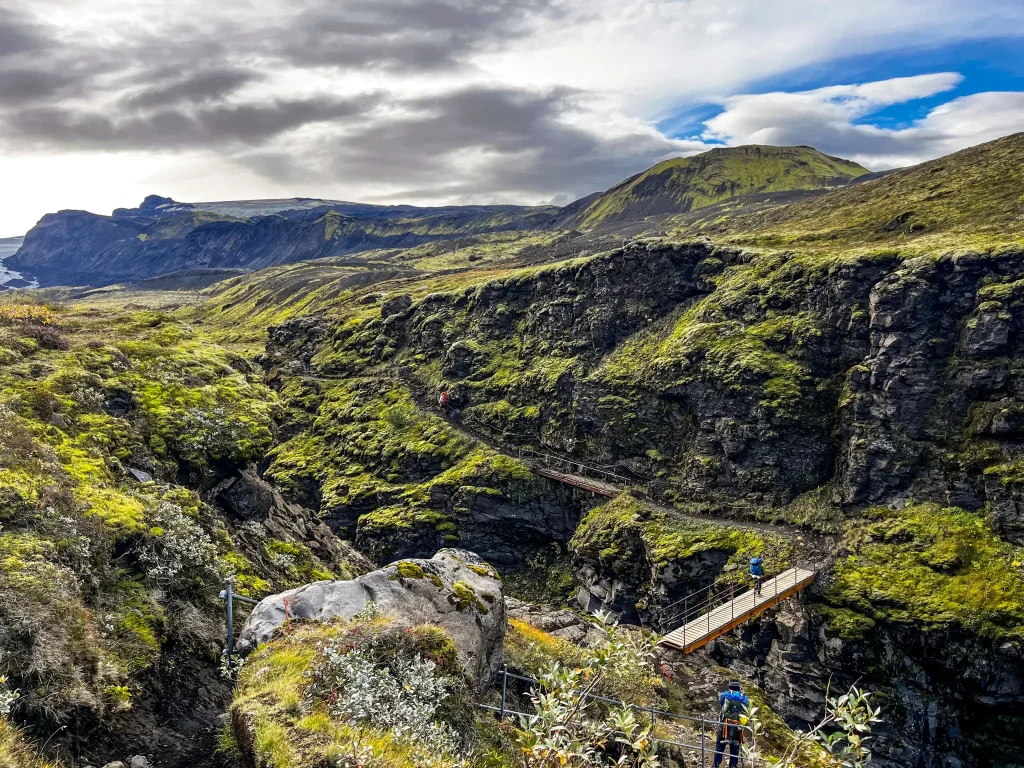
The 26 Waterfalls of Skógá River
- After the pass, the trail descends alongside the Skógá River, where you’ll pass approximately 26 waterfalls before reaching Skógafoss.
- Each one is unique—narrow slots, multi-tiered cascades, mossy canyons, and thundering drops.
- The descent is steady and scenic all the way to the finish line.

Not everyone who hikes the Laugavegur plans to continue on to Skógafoss, and that decision sometimes isn’t clear until reaching Þórsmörk. If you’re unsure whether adding Fimmvörðuháls makes sense based on your experience, time constraints, or comfort with exposure and changing conditions, our breakdown of whether you should add Fimmvörðuháls to the Laugavegur walks through the key factors to consider before committing to the extension.
Budget Overview
The cost to hike the Laugavegur Trail varies widely depending on your hiking style, how many days you take, and whether you extend the journey over the Fimmvörðuháls Trail to Skógafoss.
If you already own quality backpacking gear, camping is the most economical way to complete the hike. Mountain huts add cost but offer comfort, protection from harsh weather, and a lighter pack since you don’t need to carry a tent or cooking gear.
For those who prefer more convenience (and don’t mind paying for it), guided tours provide meals, gear transport, and local expertise—ideal for hikers short on time or new to multi-day trekking.
If you want to calculate your own total based on camping vs huts, bus routes, and group size, our free Laugavegur budget planner helps you map out realistic numbers before booking.
🥾 Free Laugavegur Budget Planner
Plan your Laugavegur hike with real numbers instead of guesswork. This free budget planner helps you track expenses, convert ISK to your home currency, and split costs by hiker, so you know what the trip will actually cost while you’re planning it.
Huts vs Camping
| Option | Cost per night | What’s included | Notes |
|---|---|---|---|
| Camping | ISK 3,400 per person | Tent space, toilet access, potable water, a tent shelter for cooking and socializing | The most budget-friendly option, but campsites are exposed to wind and rain. A solid, storm-ready tent is essential. |
| Mountain Huts | ISK 17 000 per person | Shared bunk rooms, toilets, cold running water, kitchen area with stoves | No bedding. You’ll need your own sleeping bag and food. Huts must be booked months in advance through fi.is. |
Transportation to and from the Laugavegur Trail
Most hikers travel between Reykjavík and Landmannalaugar (the northern trailhead) and finish in Þórsmörk or Skógar. The two main bus companies serving these routes are Reykjavik Excursions and Trex, both offering daily summer service with stops at popular trail access points.
There are also other bus options that connect to towns such as Hella, Skógar, and Selfoss. Schedules and prices can vary depending on the season, so it’s best to check directly with the bus companies for up-to-date routes and fares.
| Route | Estimated Cost (one-way) |
|---|
| Reykjavík → Landmannalaugar | ISK 14,000–16,000 |
| Þórsmörk → Reykjavík | ISK 14,000–16,000 |
| Skógafoss → Reykjavík (if hiking Fimmvörðuháls) | ISK 10,000–12,000 |
| The Hiker’s Pass (Round Trip) | ISK 27,900 |
For the most accurate estimate, download our free budget planner, and insert your numbers.
Guided Tours
If you prefer not to plan logistics yourself, guided treks range from ISK 250,000–350,000 (USD 1,800–2,500) for 4–6 days.
These usually include:
- Hut accommodation
- All meals
- Luggage transport between huts
- Local guide and group support
They’re more expensive but ideal for travellers with limited time or those new to multi-day backpacking.
Laugavegur Trail Final Thoughts
The Laugavegur Trail was everything we hoped for and more — raw, unpredictable, and wildly beautiful. It’s some of the absolute best Iceland has to offer. No photo or video can prepare you for the adventure of walking through steam vents one moment, crossing icy rivers the next, and watching the colours of the rhyolite mountains shift in the changing light.
It’s not a trail you simply “do.” It’s one that stays with you — in the smell of sulfur, the sound of glacial streams, and the deep sense of pride when you finally walk into Þórsmörk (or Skógafoss, if you continue on).
We learned that the challenge isn’t just physical — it’s mental, too. You have to be flexible with plans, patient with the weather, and confident in yourself and your gear. Some days we hiked through fog so thick we could barely see the trail; others were pure magic, with jaw-dropping views waiting around every corner. Many of those small lessons and adjustments later became part of our Laugavegur Trail tips after reflecting on what worked — and what we would approach differently next time.
If you’re considering Laugavegur, go prepared — but go. It’s one of those rare adventures that reminds you how small you are, and how capable you can be. One of life’s greatest blessings is the ability to experience the beauty that still thrives in wild, untouched places like this.